Pages

Wednesday, March 28, 2012

BBQ Pork Fried Rice

I have not had a full night's sleep in the last three weeks!  With three kids, there's always someone waking us up for a myriad of reasons... middle child had a nosebleed at 2am the night before, Baby had a nosebleed last night at 2am... Baby realized that she was able to open her bedroom door at 2am and come to our bedroom 3-4 nights in a row last week... 

Today, it finally caught up with me...  When McDreamy came home from work, I told him that undead zombies have more energy than me!  Looking at the fridge, I only had enough energy to whip something out of leftovers *in zombie mode*:  BBQ Pork Fried Rice.

  
My father taught me this recipe and it is genius how a recipe that uses good, basic ingredients can make something so incredibly delicious.  Thank goodness he taught me this recipe or else it would be forever lost.  

Lately, I have been having an atrocious time trying to find recipes for certain honest, home-cooked Cantonese dishes.  Instead, I have found 5 completely different versions of the same recipe.  Asking friends and family members was also entertaining:  I got very vague amounts for ingredients and equally perplexing instructions!  OR the classic response "Go buy it from T&T!".  Ummm.... I live 6.5 hours away from the nearest T&T Asian Supermarket and I really do want to make these classic dishes from scratch.

Because of this frustrating experience, I vow to document my family recipes and hand it down to further generations. Now the irony:  I normally *guestimate* this recipe in true Chinese cooking fashion because this dish is so forgiving.


I am not usually so organized but this recipe is pretty easy to get the stuff together in no time:  leftover rice, beaten eggs, frozen veggies, diced cooked meat. 

  
Preheat wok or large 6L/6qt pot to medium-high heat and add canola oil.  Add just enough oil to cover the bottom of the pan. The bottom of my wok is 7-inches, so I used about 1 Tbsp oil.  For my 6L/6qt pot, about 1-2 Tbsp.  This is a rough estimate, as you need just enough to cover the bottom so the beaten eggs don't stick to the pan.


Boy, I am so lucky to get lovely farm fresh eggs!  These eggs were from a friend that lives just 5 minutes away. 


Add the beaten eggs to the pan and cook 1-2 minutes.  It will spread out and look like you are making an omelette.  


When the eggs are half-cooked, dump the cold (and hardened) day-old rice into the undercooked eggs.  I used about 8 cups of cooked rice.  With a spoon or spatula, mix the rice and eggs up occasionally.  The eggs will break up and distribute into the rice evenly.  The rice will soften as well.    

My tip:  use cold, day-old rice.  If the rice is too freshly cooked, then the fried rice will get mushy and break up.  A lot of Asian food is based on texture, so unless you like mushy fried rice, day-old rice straight from the fridge is best.  

I have used leftover white rice, brown rice and a mixture of both.  It's all good... use what you like.


Let the rice and egg mixture cook for another 2-3 minutes.  Notice how the cooked egg is nice and golden and already in little pieces?  Beautiful!  


Now you can add the thawed and precooked (microwaved) peas and stirfry for another 2-3 minutes.  I noticed that my father and authentic Chinese restaurants used only green peas.  Our local Chinese/Western restaurant used mixed frozen vegetables and I thought it was a great way to get those extra veggies into the kids. The beauty is that I don't have to wash, peel and cut any veggies! 


Since most of the ingredients are already cooked, it is just a matter of warming them up in the wok.  Next goes 2 cups of BBQ pork into the mixture.  My father was so creative in his fried rice. His ability to adapt it to different kinds of meat shaped how I change other recipes to my needs.  He has made different versions with deli black forest ham, diced hot dogs, grocery store rotisserie chicken, BBQ pork, spam...well, whatever we had in the house. 


The dish is almost finished.  Now it's time to season it.  I grew up using Lee Kum Kee's Premium Oyster Sauce Brand.  I'm sure there are other brands but my family has always stuck to this one and I know that my dishes are going to taste like "Dad's".  There is also a vegetarian stir-fry sauce and I think Lee Kum Kee had originally labelled it as vegetarian mushroom oyster sauce many years back. 

What I normally do is add 1 Tbsp oyster sauce at a time.  2 Tbsp max. as there is a strong oyster flavour nuance.  With the right amount, it gives the dish umami, or that "je ne sais quoi" pleasant savory flavour that one can't exactly pinpoint.  Then add salt in 1/4 tsp increments until it tastes just right. I usually add about 1/2 tsp kosher salt and it is flavourful and salty enough.  Some people are watching their salt intake, so seasoning is very subjective.  Some may need more or less. *Disclaimer - so that people won't say this dish is too salty or too bland!*

Garnish with finely chopped green onions (toss it about) and serve.   I usually omit this for the children, but the green onions add a bit of freshness to the dish. 


Mmmmm... Almost like Dad's!  

 OK, here's another shot since it looks yummy...   

Woody's BBQ Pork Fried Rice

1-2 Tbsp canola oil (I use 1 Tbsp oil for my 7-inch bottomed wok)
8-10 cups cold, cooked rice (white, brown or both, preferably from the night before)
2 large eggs, beaten
2 cups frozen peas, thawed, cooked (I used mixed frozen vegetables, thawed in microwave)
2 cups diced BBQ pork or char siu, or any kinds of cooked meat or extra-firm tofu. 
2 Tbsp oyster sauce
1/2 tsp kosher salt, or to taste
1 stalk green onion, finely chopped (optional garnish)

Heat oil in wok or large 6L/6qt pot under medium-high heat.  Use barely enough oil (1-2 Tbsp) to cover the bottom of the pan so the eggs will not stick.  

Add the beaten eggs to the hot oil and cook 1-2 minutes. When the eggs are half cooked, dump the cold rice into the eggs and mix well with spatula or large spoon for 2-3 minutes.  During this time, the eggs will quickly cook and distribute evenly.  

Then add the precooked vegetables and cook for 2-3 minutes, stirring occasionally.  Mix the diced cooked meat or tofu into the rice and cook for another 2-3 minutes.  Season with oyster sauce and salt, accordingly to your taste.  Garnish with finely diced green onion, if desired and serve.  


Dinner is served!  Some kiddies (like mine) don't like their food touching, so I bought these divided Corelle dishes.  I got them at our local hardware store, but I've seen them at Walmart.  It's a huge dinner sized plate. Instead of fighting their quirks, I work around it. At least the kids know that their main food groups are covered.  

My children's dinner:  sliced BBQ pork tenderloin, Greek salad and BBQ pork fried rice. My 7 year-old had 2 helpings of Greek salad and 3 helpings of rice! 
Enjoy!

Friday, March 23, 2012

Baked Mini Donuts

There are only a few more days of Spring Break vacation left and I thought it would be nice to make a happy treat...with SPRINKLES!  


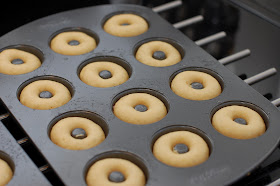
Baked mini donuts with sprinkles!  I am not brave enough to deep fry stuff so I bought 2 Wilton mini donut pans from Amazon.ca.  Each pan makes 12 small 1 1/2-inch mini donuts; perfect for the little hands in our household.  I would rather the kids eat a few of these than eat a few bites of a big one and leave it to waste (or mommy to finish). 

Using a piping bag, I was able to make 7 1/2 dozen mini donuts from this recipe. Since they are so fun to make, I will order 2 more pans.  The pans are not cheap (by my standards) at $16.99 each but factored over 5 years of school treats, playdates and potlucks, it's quite reasonable.  I am hoping that the pans last at least 5 years!  

The pan appeared to be a solid, high quality product and the non-stick finish felt pretty durable.


I didn't want to take any chances with sticking, so I brushed the cavities with softened butter.


I dumped all the ingredients into my KitchenAid mixer and mixed it up on medium speed until a batter formed. Then I put the batter in a pastry/piping bag for cake decorating.  The cavities were pretty small, so piping the batter made the whole process quick and effortless.   


The cavities were not quite filled with halfway and when baked for 4 minutes, they puffed up nicely to a perfect donut shape.   


Removing the donuts from the pan required a little bit of patience.  I used a butter knife to delicately lift each one out.  There were a few that didn't release immediately, so I waited a few minutes and then it slipped out.  Patience is the key!


My kiddies saw me take the first batch out and then immediately inhaled a dozen!  I still needed to decorate them with some melted chocolate and sprinkles!


If I was to dip over 70 mini donuts, I needed a chocolate product that would dry quickly and be easy to melt and dip.  Wilton's Candy Melts were very nice to use.  I followed the microwave instructions and they melted in a matter of minutes.  I also used "melting wafers" from the bulk section of my grocery store and they were good too.  Chocolate chips were not designed to melt easily.  Rather, they were meant to retain their shape at a high temperature. The melted chocolate chips were too thick and gooey to dip efficiently, so I prefer candy melts or melting wafers.

Baked Mini Donuts

2 cups all-purpose flour
3/4 cup white sugar (I use 1/3 cup brown sugar & 1/3 cup white)
2 teaspoons baking powder
1/4 teaspoon ground nutmeg
1 teaspoon salt
3/4 cup milk
2 eggs, beaten
1 teaspoon vanilla extract
2 tablespoons melted butter 

Preheat oven to 325 degrees F (165 degrees C). Lightly grease a mini donut pan.
In a large bowl, mix flour, sugar, baking powder, nutmeg and salt. Stir in milk, eggs, vanilla and butter. Beat together until well blended.  

Fill each donut cup approximately 1/2 full. Bake 4 minutes in the preheated oven, until donuts spring back when touched. Allow to cool slightly before removing from pan. 

- Adapted from Allrecipes.com: Fluffy Cake Doughnuts


Don't these look scrumptious?


White melting wafers from the grocery store's bulk section.  Yes, the sprinkles make me happy!  


  Enjoy!


Saturday, March 17, 2012

Ben & Jerry's Mint Oreo and French Vanilla Ice Cream


Happy St. Patrick's Day!  I thought it would be nice to make a green treat for the kiddies.  Since it falls in the middle of Spring Break, they wouldn't have the chance to enjoy St. Patrick's Day goodies at school.

I wanted to make something green, fun and tasty:  Mint Oreo ice cream!


Can I introduce you to my lovely ice cream maker?  It is a Cuisinart ICE-30 stainless steel model that I got from Costco in Richmond about 5 years ago for $59!   It was an easy decision as the ice cream maker attachment for my KitchenAid mixer was $120 at the time.  

It's very easy to use.  Pre-freeze the canister overnight (I keep it always frozen in the freezer).  Place the frozen canister back into the machine and pour the ice cream base into it.  Turn it on and leave it running for 20-25 minutes.  At the end of that time, the ice cream will have the consistency of soft-serve.  I transfer it to some plastic containers and freeze for a few hours or overnight for hard ice-cream.

Over the years, I have been searching for a good vanilla ice cream base:  one that will be really good with different combinations of yummy additions, like pieces of kit-kats, coffee crisp, oreo cookies... well, you can see the possibilities are endless!  I have tried many versions of custard (cook) and non-custard (no-cook) ice cream bases, but I found Ben & Jerry's version the easiest and simplest.  The list of ingredients is very basic and yet it produces an amazing product.  Yes, it calls for raw eggs, but I get around this by using pasteurized liquid eggs.

I prefer the use of eggs in ice cream for that smooth velvety texture and mouthfeel.  There is so much chemistry and factors involved in making ice cream but I think Ben & Jerry have a pretty good idea about what they are doing!  Knowing what I put in the ice cream makes it all worthwhile.  Yes, I do buy ice cream on sale, but it's fun to also make your own.

Ben & Jerry's brand is associated with expensive, premium ice cream.  $7 for a pint (2 cups) of ice cream is pretty expensive, so I don't bother buying it.  When I discovered the Ben and Jerry's Ice Cream cookbook on Amazon.ca with glowing reviews, I knew that I had to have it.  It's not a very detailed book, but rather, it's a fun and simple cookbook with cute, cartoony pictures. 

By my rough calculations, a pint of my own homemade Ben & Jerry's ice cream costs under $2.50!


Ben & Jerry's Mint Oreo Ice Cream 

2/3 cup coarsely chopped Oreo cookies
1/2 cup pasteurized liquid egg (or 2 large eggs)
3/4 cup sugar [Edited to add sugar]
2 cups whipping cream
1 cup milk (I use organic whole milk)
2 teaspoons peppermint extract
few drops green food colouring (optional) 

Whisk the eggs in a mixing bowl until light and fluffy, 1-2 minutes. Whisk in the sugar, a little at a time, then continue whisking until completely blended, about 1 minute more.

Pour in the cream and milk and whisk to blend.  Add the peppermint extract and few drops of green colouring and blend again. Transfer the mixture to an ice cream maker and freeze following manufacturer's instructions. After the ice cream stiffens, about 2 minutes before it is done, add the chopped cookies, then continue freezing until the ice cream is ready.

Makes about 4 cups.  

French Vanilla version:  Instead of peppermint extract, use 2 tsp. vanilla extract. 


I also made Vanilla Bean Ice Cream. Instead of peppermint extract, I used 1 tsp. vanilla extract and 1/2 tsp.vanilla powder (ground vanilla beans).

I couldn't help myself.  Green sugar cookies needed to go with the ice cream.  I made froggies and trees instead of shamrocks!  Aren't they cute?   


Enjoy!

Wednesday, March 14, 2012

Chewy Whole Wheat Oatmeal Raisin Cookies

Too bad the lemon squares are all gone, but that only means I can make something else!   This time, I will make something a little bit heartier and healthier, so the kids won't be too wound up from all the sugary treats.

This is my "go-to recipe" for oatmeal raisin cookies.  I discovered this spicy oatmeal raisin recipe from Allrecipes.com almost 10 years ago and it's been a family favourite ever since.  Over the years, I have made a few subtle changes.  I should have an updated version so the kids can make it taste "like mom's".  

Out of pure laziness, I used Western Family's soft non-hydrogenated margarine instead of butter and shortening. I don't like waiting for butter to "soften" to room temperature.  A-ha! Soft margarine is *already soft*!   I love the taste of butter, but sometimes I need a break from its richness.  Another bonus: I find that the cookies remain soft and chewy the next day.  For some reason, my cookies turn out like hard hockey pucks when I use butter.

Instead of white all-purpose flour, I used whole wheat flour and no one noticed.  For the kids, I cut down the spices to make a smoother, milder flavour.  As well, I usually decrease the sugar but it's a personal preference.  I don't like my treats too sweet, or else my cabin-fever kids will be rebounding off the walls.  For playdates, I bump the sugar back to the original recipe, as I know that everyone has a sweeter palate than ours.  


One of my favourite kitchen toys is a medium sized ice cream scooper.  It easily makes lovely uniform cookies in record time.


Another tip in making soft and chewy cookies is to *underbake* the cookies.  I know they are done when the edges are turning golden brown but the middle still looks a bit gooey.  The tops are a little dry and instinct tells you it needs a few more minutes but actually they are ready to come out of the oven!  


Notice that the cookie on the lower left corner looks like it needs a few more minutes, but it is done!  You need to leave them on the pan for 5 minutes after you pull it out of the oven.  This will help set the cookie up.  Then transfer to a cooling rack. 


The cooling rack *was* full of cookies.  The kids saw hubby taste one and they nicely demanded that they needed one too.  I usually get 33 cookies out of this recipe.  At the end of the day, I think half are remaining. 

Chewy Whole Wheat Oatmeal Raisin Cookies
  
1 cup non-hydrogenated margarine (or half softened butter and half shortening)
1 cup packed light brown sugar (I can get away with 3/4 cup)
1/2 cup white sugar (I use 1/3 cup)
2 eggs
1 teaspoon vanilla extract
1 1/4 cups whole wheat flour
1 teaspoon baking soda
1 teaspoon ground cinnamon
1/4 teaspoon ground cloves
3 cups rolled oats
1 cup raisins

Preheat oven to 350 degrees F (175 degrees C).
In a large bowl, cream together the margarine, brown sugar, white sugar, eggs, and vanilla until smooth. Combine the flour, baking soda, cinnamon, and cloves; stir into the sugar mixture. Stir in the oats and raisins. Drop by rounded teaspoonfuls onto ungreased cookie sheets.

Bake 10 to 12 minutes until light and golden. Do not overbake. Let them cool for 2-5 minutes before removing from cookie sheets to cool completely. Store in airtight container. Make sure you get some, because they don't last long!

- Adapted from Allrecipes.com: Beth's Spicy Oatmeal Raisin Cookies


Enjoy!

Monday, March 12, 2012

Meyer Lemon Squares

Spring Break is here!  I have my 3 little monkeys home for 2 glorious weeks AND I will be cooking and baking up a frenzy to quiet their bottomless bellies...  

I discovered Meyer lemons at my local grocery store so I immediately grabbed a $3 bag.  After reading 100 things to do with a Meyer lemon a while back, I had to try it and see what the hype was about.  So I made Meyer lemon curd and didn't like the horribly bitter aftertaste. I salvaged that mess by making ice cream with it.  Much better!  

I still had a few lemons left, so I made my favourite lemon square recipe, adapted from my Betty Crocker cookbook.  The juice was still tart, but it lacked that zesty lemony zing.  Meyer lemon juice is supposed to be less acidic than regular lemon juice. 

I don't like my desserts too sweet and too sour, so if you like a really zippy lemon square, you could double the lemon juice.  I cut down the sugar by 1/3 in the filling to get a light and smooth lemony filling on top of a crunchy, buttery shortbread crust. With the Meyer lemons, the squares turned out much sweeter but the family didn't get a chance to complain when they inhaled them for breakfast!


I just realized that I have made these for almost 20 years!  I usually double the recipe for a 9"x13" pan with great results.  They can also be made in advance and frozen for a month or so.  Definitely a recipe that my children would appreciate when they are old enough to make it themselves. 

Meyer Lemon Squares

Crust:  
1 cup all-purpose flour 
1/2 cup butter
1/4 cup powdered sugar

Filling:  
2/3 cup granulated sugar
2 teaspoons grated lemon peel, if desired
2 tablespoons lemon juice
1/2 teaspoon baking powder
1/4 teaspoon salt
2 eggs
Powdered sugar

Preheat oven to 350ºF.  Mix flour, butter and powdered sugar. Press in ungreased square pan, 8x8x2 or 9x9x2 inches, building up 1/2-inch edges. Bake crust 20 minutes.  

Beat granulated sugar, lemon peel, lemon juice, baking powder, salt and eggs with electric mixer on high speed about 3 minutes or until light and fluffy. Pour over hot crust. 

Bake 25 to 30 minutes or until no indentation remains when touched lightly in center. Cool; dust with powdered sugar. Cut into about 1 1/2-inch squares. 


Of course, I had to share them with an amazing friend, who just had her FOURTH baby girl a few weeks ago!


Enjoy!

Wednesday, March 7, 2012

Simple Chicken Broth Congee


Comfort food for an Asian family should include a hot steaming bowl of congee (or jook in Cantonese).  Hubby had a medical course down in Vancouver for the weekend and somehow, the baby got the stomach flu.  I wasn't sure if it was something bad she ate or a bug, but the next two days, she was fine.  On the day we left, she had diarrhea and vomiting during our 7-ish hours of driving back home.  Not pretty.  Actually, it was downright nasty.

We were very happy to come home!  Then the next day, the middle child got sick with a bad cold bug.  To replenish everyone's fluid loss, a nice hot comforting bowl of congee is what *Dr. Michelle* ordered.  

Congee is a rice porridge.  Much like making oatmeal porridge, rice and water is used instead, along with some savoury add-ins.  Chinese restaurants offer this with different kinds of meat, dried oysters, preserved duck egg and peanuts.  The possibilities are endless.  

I noticed that every Chinese family has their own version.  It depends on what tiny village from China they come from and the condiments they use.   There are so many different tricks and tips used to make a smooth, velvety bowl.  For example, some mix washed rice with some vegetable oil and then soak overnight before cooking. Some people like theirs thick, some runny.  It is all a matter of preference.  I haven't tried using brown rice, but I'm sure that would be good too.  I just made this simple as the children were sick and I didn't think far ahead to soak the rice the night before!  

In our case, I made it on the runny side to increase fluid intake.  Rice is also part of the BRAT diet:  Bananas, Rice, Applesauce and Toast, which is good for those with tummy issues.  

I decided to document this recipe for my kids, as I should have asked my parents how to make it but always forgot.  Besides, they would end up telling me to put rice and water together and cook until done!  

I like using a 1L box of chicken broth, as it always comforting when feeling under the weather.  I prefer to use organic low sodium chicken broth, but I tried no salt chicken broth, as it is a relatively new product in the stores and it was on sale. 


My recipe is pretty straight forward.  I washed 1 cup of white long grain rice (I used jasmine rice), added 1 box of chicken broth (roughly 4 cups) and then added 3 boxes of water (about 12 cups).  Yes, 16 cups of total fluid!  


Let it come to a boil and simmer for about 2.5-3 hours, covered.  After an hour or so, the rice grains will look fat and bloated.  Eventually, they will break up and then look smoother and thicker, like oatmeal.   It takes time.  I'm sure there is a quicker way.  

Season to taste, as the salt content is dependent on the brand of chicken broth used.  With Campbell's No Salt Added Chicken Broth, I added about 1/2 teaspoons of kosher salt.  You can always add more salt when serving.  This recipe can be easily halved, as it makes a lot and it is pretty runny, like thin oatmeal.  I would have liked to add an extra 1/4 cup rice, but it will thicken as it sits.  In retrospect, better to make it thicker and then add more water to thin it out than to have it too runny.  

Simple Chicken Broth Congee
  • 1 1/2 cups washed white, long grain rice (I used 1 cup rice for thinner congee)
  • 1 (900ml, 1 L, 4 cups) box low sodium chicken broth
  • 3 boxes water (3L, 12 cups equivalent)
  • salt, to taste
Wash white rice, add chicken broth and water.  Bring to a boil and then simmer for 2.5-3 hours. Season to taste and ladle into bowls.  

I'm sure this recipe would be good in the slow cooker.  


Finished product.  Notice that it's almost half eaten in one sitting!  My oldest and the baby had three helpings!