Using a piping bag, I was able to make 7 1/2 dozen mini donuts from this recipe. Since they are so fun to make, I will order 2 more pans. The pans are not cheap (by my standards) at $16.99 each but factored over 5 years of school treats, playdates and potlucks, it's quite reasonable. I am hoping that the pans last at least 5 years!
The pan appeared to be a solid, high quality product and the non-stick finish felt pretty durable.
I didn't want to take any chances with sticking, so I brushed the cavities with softened butter.
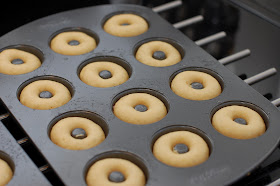
I dumped all the ingredients into my KitchenAid mixer and mixed it up on medium speed until a batter formed. Then I put the batter in a pastry/piping bag for cake decorating. The cavities were pretty small, so piping the batter made the whole process quick and effortless.
The cavities were not quite filled with halfway and when baked for 4 minutes, they puffed up nicely to a perfect donut shape.
Removing the donuts from the pan required a little bit of patience. I used a butter knife to delicately lift each one out. There were a few that didn't release immediately, so I waited a few minutes and then it slipped out. Patience is the key!
If I was to dip over 70 mini donuts, I needed a chocolate product that would dry quickly and be easy to melt and dip. Wilton's Candy Melts were very nice to use. I followed the microwave instructions and they melted in a matter of minutes. I also used "melting wafers" from the bulk section of my grocery store and they were good too. Chocolate chips were not designed to melt easily. Rather, they were meant to retain their shape at a high temperature. The melted chocolate chips were too thick and gooey to dip efficiently, so I prefer candy melts or melting wafers.
Baked Mini Donuts
2 cups all-purpose flour
3/4 cup white sugar (I use 1/3 cup brown sugar & 1/3 cup white)
2 teaspoons baking powder
1/4 teaspoon ground nutmeg
1 teaspoon salt
3/4 cup milk
2 eggs, beaten
1 teaspoon vanilla extract
2 tablespoons melted butter
Preheat oven to 325 degrees F (165 degrees C). Lightly grease a mini donut pan.
In a large bowl, mix flour, sugar, baking powder, nutmeg and salt. Stir in milk, eggs, vanilla and butter. Beat together until well blended.
Fill each donut cup approximately 1/2 full. Bake 4 minutes in the preheated oven, until donuts spring back when touched. Allow to cool slightly before removing from pan.
- Adapted from Allrecipes.com: Fluffy Cake Doughnuts
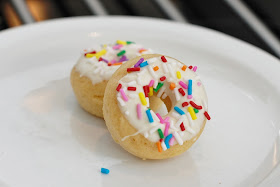
Don't these look scrumptious?
Enjoy!


No comments:
Post a Comment
Let me know what you think!