Showing posts with label Breakfast. Show all posts

Tuesday, October 1, 2013

Fluffy and Moist Sour Cream Banana Bread (Whole Wheat option)

This morning, I volunteered for the "Breakfast for Learning Program" at my older kiddies' elementary school.   Through generous donations from the community, school and the Parent Advisory Committee (PAC), our children's school can offer a simple breakfast for those who come to school hungry.  The PAC helps purchase and provide juice, milk, yogurt, cereal bars, cinnamon buns and muffins.  Depending on the volunteer, someone can make pancakes or waffles for a hot breakfast!  

  
Since this was my first gig for the year, I simply set out the usual milk, fruit, juice and store bought bran muffins.  To test the waters, I also brought a batch of my sour cream whole wheat banana bread.  I made them into mini muffins, mini loaves and a big loaf.  I was OVERWHELMED by the response!  When I ran out of mini muffins, I cut up the last loaf and it was GONE IN SECONDS.  Wow.  

This is another one of those recipes that I have been using for over 10 years.  Great for gift-giving and Christmas.  I think the secret is the moistness and fluffiness from the sour cream. 

What can a creative mom do to get school kids try whole wheat banana bread?  For marketing purposes, I added some chocolate chip garnish, so they can try my home baked goodies.  And sprinkled a wee bit of cinnamon sugar on top... I got rave reviews!!!  No one noticed that I used half whole wheat flour in the recipe.  


Fluffy and Moist Sour Cream Banana Bread
makes 4- 7"x3" loaf pans

3/4 cup butter (I used non-hydrogenated soft margarine)
3 cups white sugar (I decreased to 2 1/2 cups)
3 eggs
6 very ripe bananas, mashed (I used 5 large ripe bananas)
1 (16 ounce/2 cup) container sour cream (I have used light sour cream, plain yogurt and combination of both)
2 tsp vanilla extract
2 tsp cinnamon
1/2 tsp salt
3 tsp baking soda
4 1/2 cups all-purpose flour (2 cups whole wheat flour + 2 1/2 cups all-purpose flour)
1 cup chopped walnuts, optional (I used chocolate chips in the batter + on top instead)

Preheat oven to 300F.  Grease four 7x3 inch loaf pans.

In a large bowl, cream butter and sugar.  Mix in eggs, mashed bananas, sour cream, vanilla and cinnamon.  Mix in salt, baking soda and flour.  Stir in nuts (or chocolate chips, if desired). Divide into prepared pans.

Bake for 1 hour, until a toothpick inserted in center comes out clean.

Note:  I have baked this as mini muffins, muffins, mini loaves and in loaf pans.  It is a very flexible recipe that can handle substitutions and changes, if needed.  I have also baked this at 350F for mini muffins and mini loaves.  Please check the times accordingly so you don't overbake!  


Mini muffins made without any nuts or chocolate chips. 


I had to promise the school kids that I will bring more next time!  I couldn't cut my last loaf fast enough for them!  That is the biggest form of flattery for this mom!  They really made my day.

Have a wonderful day!

Enjoy!
Pin It

Wednesday, May 29, 2013

Maple Yogurt Banana Muffins

It has been too long since I posted a recipe!   We had a huge change in routine ever since we started karate and violin lessons for all 3 children and mommy!  On top of that, I have been getting my flower beds and veggie patches ready for our short and late growing season.  No wonder I'm tired these days...  

Whew!   

I had a craving to make banana muffins.  Is that an odd notion? Even with my sudden food allergies, I still like to bake things I cannot eat.  It's the act of baking that makes me happy.  I pray that one day, my body will heal itself and I can enjoy the same foods as my family.  In the meantime, it hasn't stopped me from making their favourite classics, like banana muffins. 


I used my Honey Whole Wheat Banana Muffins recipe and used maple syrup and plain yogurt instead of honey and buttermilk.  Hubby had the difficult task of tasting these muffins and he declared them "good".  The children enjoyed them too with a glass of milk after school snack.  They were also convenient for a quick and easy breakfast.   

Maple Yogurt Banana Muffins
makes 12 regular sized muffins 

1 ½ cups whole wheat flour
½ cup wheat germ
2 Tbsp ground flax seed
1 tsp cinnamon
1 tsp baking soda
1 tsp baking powder
1 large egg
1/3 cup maple syrup
1/3 cup plain yogurt
1 tsp vanilla extract
¼ cup canola oil, melted butter or coconut oil, melted (I used melted butter)
4 bananas, mashed (between 1-2 cups, it's a flexible recipe!)

Preheat oven to 400F

Mix all dry ingredients together.  Add egg, maple syrup, yogurt and vanilla to the dry ingredients.   Add bananas and melted butter.  Mix until the ingredients are well blended together. 
  
Scoop batter in 12 greased or lined muffin tins, each about ¾ full. 
Bake about 15 min or until until done. Check the muffins around 10-12 minutes.  Mini-muffins were done around 10-12 minutes, so check accordingly.

 - Adapted from 100 Days of Real Food:  Whole Wheat Banana Bread


My kiddies prefer the "mini" muffin size for their little hands.  I filled each greased mini muffin cavity up to the top.  I was able to make 24 mini muffins and 2 regular sized muffins in paper lined ramekins.  The mini-muffins were done baking around 10-12 minutes.  

Enjoy!

Pin It

Sunday, January 27, 2013

Turkey Breakfast Sausage Patties with Flaxseed - Gluten-Free, Egg-Free, Dairy-Free

I like to simplify breakfast as much as possible.  When I wake up, it's a mad dash to get all three kiddies dressed, fed and off to school. Then is it my turn for breakfast!  Now that I am not eating eggs, I sometimes have lean turkey breakfast sausage patties to help start my day.  I make a batch and reheat them the next few days.   
  

At first, I tried Gracious Pantry's Clean Eating Turkey Breakfast Sausage.  It was a very easy recipe to whip together.  However, the ground turkey's flavour was a little too strong/gamey for me and needed a few more herbs and spices to counter this.  Then I found Food.com's Turkey Breakfast Sausage Patties recipe that used more herbs and spices.  It was fun to use a wide range of herbs and spices from my inventory. 


We don't eat spicy food, so I toned down the heat considerably.  I didn't expect the children to eat these turkey patties but they enjoyed them as well!  It is a very forgiving and flexible recipe.  If you choose to make them spicier or more bland, adjust the seasonings as desired.  I played around with this recipe several times and I'm happy with the amounts of these herbs and spices.  I don't use salt, so adjust to taste.  

The addition of ground flaxseed and water helped improve the lean and dry texture of the ground turkey.  It helped bind the meat together (like an egg) and also provided extra fibre and healthy fat.   

I mixed all the ingrediets into my KitchenAid stand mixer and for a minute or until well blended.  Then I used an ice cream/cookie scoop to make large meatballs and patted them out to make 2-inch sized patties. With a digital scale, my ice cream scoop of meat weighed almost 1 1/4 oz.  When cooked, they turned out to be roughly 1 oz each.  Perfect portion control! 


I panfried them with some olive oil.  They cook up really fast!  

Turkey Breakfast Sausage Patties with Flaxseed

1 1/2 lbs lean ground turkey
1 1/2 tsp ground sage
3/4 tsp thyme
3/4 tsp oregano
1 tsp garlic powder
1 tsp onion powder
1/4 tsp allspice
1/4 tsp fennel seeds
1/4 tsp ground black pepper
1/8 tsp chili flakes
1/8 tsp nutmeg
1/8 tsp cloves
1/4 cup water
1 Tbsp ground flaxseed

Combine all ingredients and blend well.  Refrigerate meat mixture overnight (optional).  Form into patties and cook as needed, freezing leftovers.  Don't overcook or they will dry out--remove from the heat as soon as they're no longer pink inside, but still juicy.  (If you prefer a moister texture, you add a splash of olive oil or an egg to the mixture just prior to cooking)

- Adapted from Food.com's Turkey Breakfast Sausage Patties


My lunch today!  Turkey sausage patties served with a fresh mixed green salad, some fruit and a side of brown rice pasta topped with melted vegan cheese.  It was delicious!

Enjoy!
Pin It

Wednesday, January 16, 2013

Overnight Steel Cut Oats and My Favourite Healthy Breakfast

In the New Year, I thought it would be nice to make a better effort to eat less sugar and processed food.  I wanted to try make steel cut oats a part of my breakfast since oatmeal has so many health benefits.  


Steel cut oats are not rolled and they look like broken up bits of brown rice. They take much longer to cook than old-fashioned rolled oats but that is part of its beauty.  Since they are less processed, they take longer to digest and keep our blood sugar even.


According to the package, it takes about 10-20 minutes to cook.  Our busy mornings do not afford this time, so I make a few days worth the night before using an easier method. Whenever I have time (in the afternoons or right before bed), I take 1 cup steel cup oats and 2.5 cups of water.  I like the 1:2.5 ratio.  I like my oatmeal with a little bit of a chew.  


Bring to a boil, cover and simmer on LOW for only 5 minutes


Oops!  I didn't turn down the heat low enough and it boiled over.  


Just a peek at the oats after simmering for a few minutes. 

Turn off the heat and let it sit on the warm burner overnight or for several hours until cool enough to put in the fridge.  That's it!  I don't have time to wait for 10-20 minutes for breakfast in the mornings.  Reheat oatmeal in the microwave and eat it the same manner as regular oatmeal.  One serving is 1/2 cup cooked steel cut oatmeal.    

Note:  If you like the texture of your steel cut oatmeal to be a harder/chewier or softer/mushier, adjust the cook time and the amount of water to your preference.   


Steel cut oats have become my favourite healthy breakfast in the new year.  This is what I normally do:  I warm up some oatmeal with brown rice protein powder and nondairy milk in the microwave.  Then top with fresh or thawed frozen blueberries, a tablespoon of ground flaxseed, and sweetened with a teaspoon of raisins and a dash of cinnamon.  


I was able to find unsweetened brown rice protein powder as an alternative because I have an egg and dairy intolerance.  I am hoping this food intolerance is just temporary!  

Everything in my "breakfast bowl" can be swapped for different toppings and ingredients as desired.  This oatmeal provide a nice base for a healthy, sugar-free breakfast.  

The combination of protein powder and oats gives me the energy needed to get the kids out the door and my day started.  I found that just 1/2 serving of protein powder (half the amount to make 1 protein shake) was enough to give the oatmeal the last power til lunch. Without protein or some sort, I was ravenous within 2 hours.  

Overnight Steel Cut Oats

1 cup (8 oz) uncooked steel cut oats
2.5 cups (20 fl oz) water

Bring water and steel cut oats to a rolling boil.  Simmer on LOW for 5 minutes.  Turn off heat and leave on warm burner overnight or for a few hours until cooled.  Refrigerate.  Makes at least 3 cups of cooked oatmeal.  Reheat and serve like regular oatmeal.  

High Protein Berry Steel Cut Oatmeal

1/2 cup (4 oz) cooked steel cut oats
1/2 serving (15g)  protein powder (I use brown rice protein powder)
2-3 Tbsp milk as needed (I use rice or almond milk) 

1/2 cup (4 oz) berries (fresh or frozen and thawed)
1 Tbsp ground flaxseed
1 tsp dried fruit bits (cut dates, prunes, raisins, etc for added sweetness)
optional:  drizzle of maple syrup if not sweet enough

Mix 1/2 cup steel cut oatmeal with 1/2 serving protein powder and 2-3Tbsp milk, as needed to dissolve the protein powder.  Cover and reheat in microwave for 30 seconds or until warm.  Top with 1/2 cup fresh or thawed frozen blueberries, ground flaxseed, dried fruit and a dash of cinnamon.  


I know this is not the prettiest bowl of oatmeal, but it is so hearty and fills this busy mommy's tummy for the crazy day ahead!  

Enjoy!
Pin It

Tuesday, June 12, 2012

Fresh Strawberry Scones

I had some fresh strawberries that were begging to be made into something yummy!  Inspired by the Queen's Diamond Jubilee, I thought that Fresh Strawberry Scones would be wonderful with a cup of tea in this rainy June weather. 


They turned out lovely!  I made 2 batches (28 scones total) and after sharing some, there are only 4 left! 


They were pretty easy to make.  With a pastry blender, cut the diced butter into the dry mixture.


Cut the butter down to the size of peas and the flour mixture looks like coarse crumbs.   


Dump the yogurt and egg mixture into the bowl and toss around with a fork.  Don't worry if the dough is in shaggy clumps, it will come together.  


 Look at the luscious, juicy strawberries! 


Add the dice strawberries to the dough and gently toss around with a fork.  


The diced strawberries are pretty delicate, so use a light hand in mixing in the fruit with the dough.


Pour the unformed dough onto a lined baking sheet.  I used my Silpat liner.   


Use your hands to pat all the strawberries and dough in a rectangular shape.  


Carefully cut the dough into the shape and size as desired.  Make sure the liner is not damaged. I used the edge of my silicone spatula/flipper to cut the dough. 


 Ready for the oven!

Bake at 400F for 12-15 minutes, until golden.  From this batch, I was able to cut out 14 scones.  

Fresh Strawberry Scones 

1 cup whole wheat flour
1 cup all-purpose flour
1/3 cup sugar
1 teaspoon baking powder
1/4 teaspoon baking soda
1/2 cup cold butter, diced
1 cup diced fresh strawberries
1/2 cup non-fat plain yogurt
1 large egg

1/4 cup icing sugar
1/2 tsp milk (or more if necessary)
Adjust oven rack to lower-middle position and preheat oven to 400 degrees.
In a medium bowl, mix flour, 1/3 cup sugar, baking powder, and baking soda.  Add diced butter and use a pastry blender or two knives to cut the butter into the dry mixture until it resembles coarse meal with pea sized butter pieces.

In a small bowl, whisk sour cream and egg until smooth.
Using a fork, stir sour cream mixture into flour mixture until large dough clumps form. Use your hands to press the dough against the bowl into a ball. (The dough will be sticky in places, and there may not seem to be enough liquid at first, but as you press, the dough will come together.)
Place on a lightly floured surface and pat into a 7- to 8-inch circle about 3/4-inch thick. Sprinkle with 1 tsp. of sugar (optional). Use a sharp knife to cut into 8 triangles; place on a cookie sheet (preferably lined with parchment paper), about 1 inch apart. Bake until golden, about 12-15 minutes. Cool for 5 minutes and serve warm or at room temperature. 

To make icing glaze:

Add 1/2 tsp milk to icing sugar and mix.  Add extra 1/4 tsp milk at a time if needed. Drizzle the icing over the cooled scones.  Another option is to place icing in a ziplock bag, snip a tiny corner and pipe the icing on. 

- Adapted from Allrecipes.com: Simple Scones

  
Enjoy!
Pin It

Tuesday, June 5, 2012

Whole Wheat Buttermilk Pancakes

For the longest time, my kids did not like pancakes!  Until I found the perfect buttermilk pancake recipe.  They loved the light and fluffy texture only real buttermilk gives.  I always thought that a reasonable buttermilk substitution was to add vinegar or lemon juice to milk.  However, there was actually huge difference in taste and texture.  The pancakes turned out softer, lighter, fluffier and very tender.  After all these years of baking, I have concluded that there is no substitute for real buttermilk!


Now that I got the kiddies to finally eat pancakes, I wanted to make them with whole wheat flour.  So I used a combination of whole wheat flour and wheat germ to lighten the texture.  With this recipe, I made 35 pancakes, using 1/4 cup batter for each pancake.  Yes, it makes a lot but I freeze about half the batch on a parchment lined tray in a single layer and then it goes into a freezer bag.  I always have pancakes on hand for quick breakfasts.  30 seconds in the microwave to thaw and heat a few pancakes and I'm done. 


Pancakes used to be so tedious to make in a frying pan.  I took a chance and ordered a reversible grill/griddle that spans over 2 heating elements on my stove.  I bought this Nordicware brand from my local kitchen specialty store about 5 years ago and I still use it on a regular basis.  It's so much fun to flip 8 pancakes at a time!


 Whole Wheat Buttermilk Pancakes

2 1/4 cups whole wheat flour
3/4 cup wheat germ
3 tablespoons white sugar (I used coconut sugar)
3 teaspoons baking powder
1 1/2 teaspoons baking soda
3 cups buttermilk
3 eggs
1 tsp vanilla
1/4 cup butter, melted

In a large bowl, combine flour, wheat germ, sugar, baking powder, baking soda, and salt. In a separate bowl, beat together buttermilk and eggs. Keep the two mixtures separate until you are ready to cook.

Heat a lightly oiled griddle or frying pan over medium high heat. You can flick water across the surface and if it beads up and sizzles, it's ready!

Pour the wet mixture into the dry mixture, and then mix in melted butter last. Using a wooden spoon or fork to blend. Stir until it's just blended together. Do not over stir! Pour or scoop the batter onto the griddle, using approximately 1/4 cup for each pancake. Brown on both sides and serve hot.


Adapted from Allrecipes.com: Buttermilk Pancakes II


Please pass the butter and maple syrup! 

For more breakfast ideas, check out Breakfast Ideas Monday.

Enjoy! 
Pin It

Wednesday, May 2, 2012

Whole Wheat Blueberry Honey Bran Muffins

Trying to eat better is always a struggle!  I strive for balance and moderation. The cupcakes are a great treat and fundraiser but we can't that all the time or it wouldn't be special anymore.  Looking around the web, there is a wonderful movement for eating real food.  Food that is unrefined, unprocessed, made from scratch and organic.  

So I tried to look for a bran muffin recipe that was: 1) simple and easy  2) didn't use white sugar or white flour and 3) healthy.  I came across the Eat Clean Diet website for Blueberry Bran Muffins and had to give it a try! 


They turned out beautiful!  Maybe it's just me, but I thought they were a little on the sweet side.  Hubby didn't complain that they were too sweet.  Nor did the kids.  Next time, I will try use 1/3 cup honey instead of 1/2 cup and see if anyone notices the difference. 

Whole Wheat Blueberry Honey Bran Muffins

Makes 1 dozen
1 1/2 cups wheat bran
1 cup skim milk (I used 1% buttermilk)
1/2 cup unsweetened applesauce
1 egg
1/2 cup honey (Next time will try 1/3 cup)
1/2 tsp vanilla
1 cup whole wheat flour
1 tsp baking soda
1 tsp baking powder
1 tsp salt (I used 1/2 tsp )
1 cup blueberries (fresh or frozen) (I used 1.5 cup)

Preheat oven to 375F.  Line or spray muffin tins with oil. 

Mix together bran and milk - let stand 10 minutes.

In a large bowl, mix applesauce, egg, honey and vanilla. Sift together flour, baking soda, baking powder and salt, make a well. Add wet ingredients to the dry ingredients, stir until combined. Add bran/milk mixture and mix until just blended. Fold in blueberries.

Scoop into muffin tins and bake for 15-20 minutes, until the tops spring back when lightly tapped.

- From The Eat Clean Diet: Blueberry Bran Muffins

  
It's so rewarding to watch my family enjoy these muffins.  It keeps me going.  I try my best, but I won't feel guilty for the odd bag of potato chips and a rum (Malibu!) and Coke after a rough day! 


Enjoy!
Pin It

Tuesday, April 17, 2012

Blueberry Muffins

Blueberry muffins are a classic staple in our household.  When blueberries are in season and on sale, I buy as much as I can and freeze them on cookie sheets so we can enjoy them year-round. 


I have made many muffins and realized that I learned how to make muffins way back in my Grade 8 Home Economics class.  In just a few short years, my kiddies will be old enough to make this! 

Muffins are easy to make but I was in search of a recipe that was fluffy, fruity, lightly sweetened, moist and not dense.  My old stand-by recipe was pretty good but not as moist as I would have liked.   Then I decided to try the Blueberry Muffin recipe from The New Best Recipe cookbook as posted on www.simplyrecipes.com.  I needed to use up some plain yogurt.   

Boy, was I surprised how moist and fluffy they turned out!  Almost as fluffy as a cupcake, yet still a muffin.  Of course, I didn't follow the recipe exactly but close enough to get what I was looking for.  I never would have thought that plain yogurt is the trick! 


The batter was thick and fluffy due to the plain yogurt. 


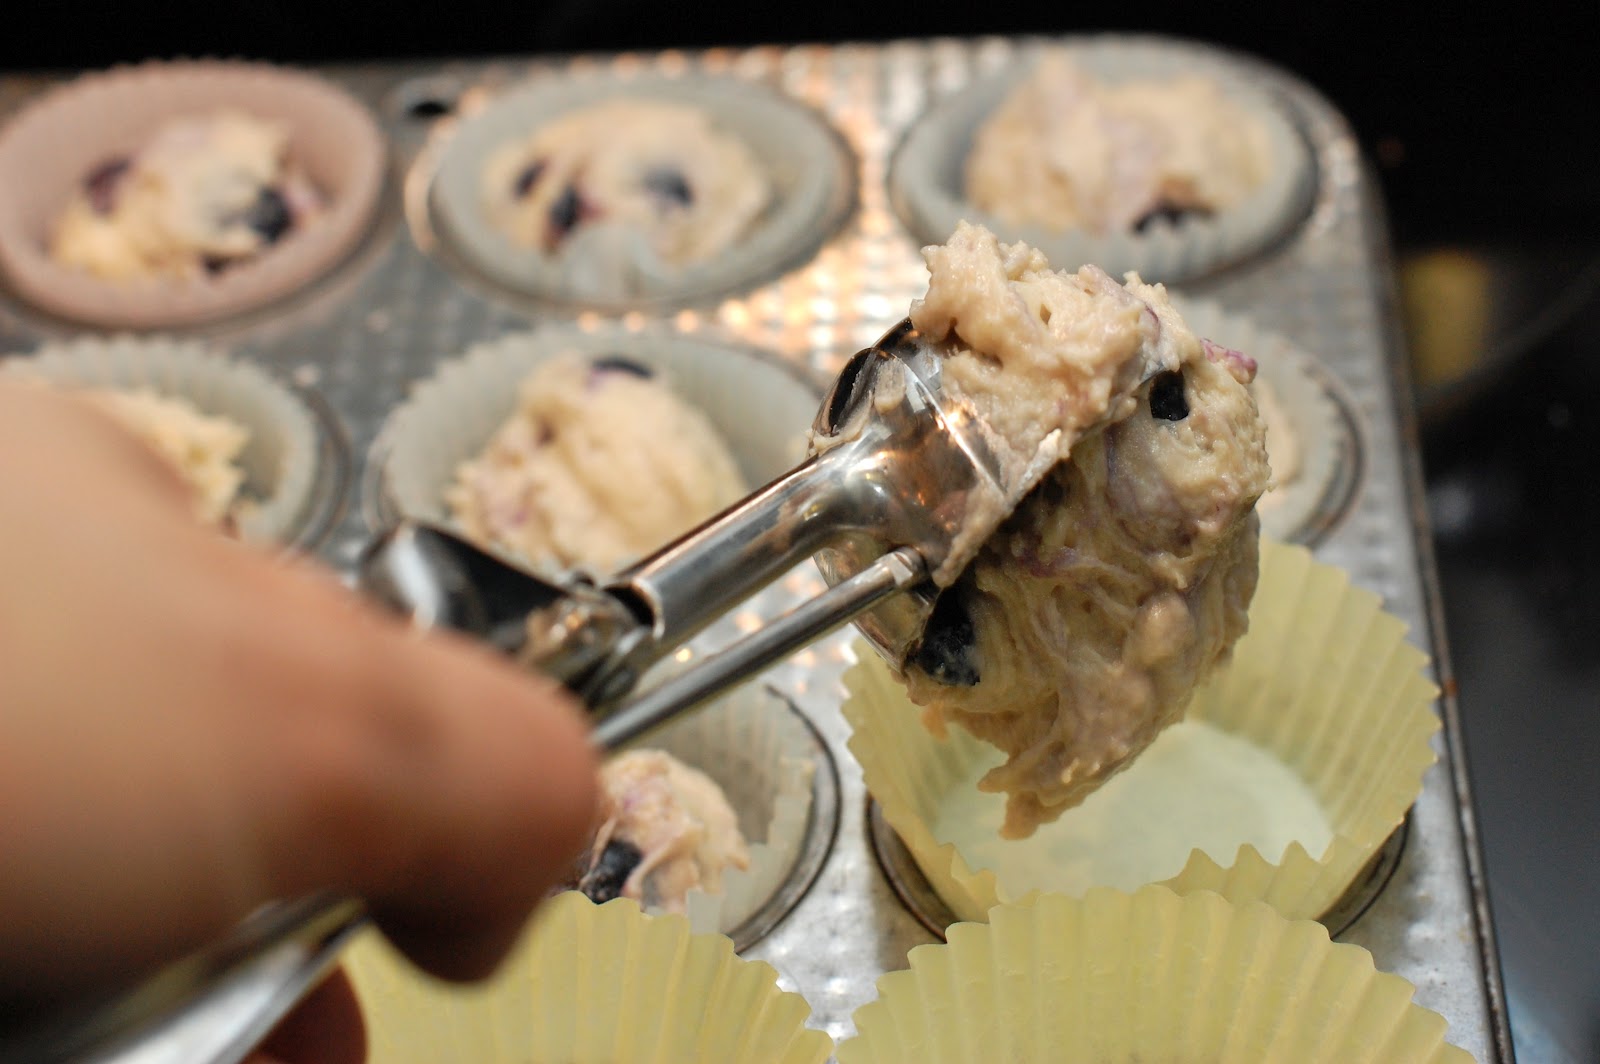
A small sized ice cream scoop made the job so much quicker and easier.  


I was able to make 12 regular and 16 medium sized muffins from one recipe. 


I filled the muffin cups right up to the top.  I also dusted them with a bit of cinnamon sugar before baking.


Finished product!  Look how they rose and browned nicely. MMMmm... 

Blueberry Muffins

3 cups of all-purpose flour
1 Tbsp baking powder
1/2 teaspoon baking soda
1/2 teaspoon salt
10 Tbsp unsalted butter, softened  (I used 1/2 cup non-hydrogenated margarine)
1 cup sugar (I used 1/2 cup brown sugar, 1/2 cup white)
2 large eggs
1 1/2 cup plain yogurt
1 teaspoon grated lemon peel (I used 2 tsp vanilla extract instead)

2 cups blueberries
1 Tbsp flour (if using defrosted frozen berries)
 1 Tbsp white sugar  (optional cinnamon sugar for lightly sprinkling tops before baking)
1/4 tsp cinnamon   

Adjust the oven rack to the middle-lower part of the oven. Preheat oven to 375°F.

Whisk together the flour, baking powder, baking soda, and salt and set aside.

In a large mixing bowl, cream butter and sugar together, beating until fluffy. Add eggs one at a time, beating until incorporated after each one. Beat in the grated lemon peel (or vanilla).

Beat in one half of the dry ingredients until just incorporated. Beat in one third of the yogurt. Beat in half of the remaining dry ingredients. Beat in a second third of the yogurt. Beat in the remaining dry ingredients and then the remaining yogurt. Again be careful to beat until just incorporated. Do not over beat. Fold in the berries. If you are using frozen berries, defrost them first, drain the excess liquid, and then coat them in a light dusting of flour.

Use standard 12-muffin muffin tins. Coat each muffin cup lightly with olive oil or grapeseed oil using a pastry brush, or with a little butter. Or use one of those convenient vegetable oil sprays. Distribute the muffin dough equally among the cups. Sprinkle tops with a little cinnamon sugar, if desired.  Bake until muffins are golden brown, about 25 to 30 minutes. Test with a long toothpick (we use a thin bamboo skewer) to make sure the centers of the muffins are done. Set on wire rack to cool for 5 minutes. Remove muffins from the tin and serve slightly warm.


Yield: Makes 12-16 muffins. (I was able to make 12 regular and 16 medium sized muffins with this recipe.  I normally check the muffins after 15 minutes and then every 5 minutes until done, as every oven is different).  

- Adapted from The New Best Recipe, posted on www.simplyrecipes.com


Enjoy!
Pin It

Wednesday, April 11, 2012

Oven Roasted Bacon

Whew!  What a wonderful Easter holiday!  A lot has happened the beginning of the month and I didn't expect April to be so busy.  First, Baby has started half-day preschool from Mondays to Fridays.  From 8:30am to 11:30am, she is hopefully improving her communication skills from screeching to *calmly and nicely asking* for whatever her heart desires.

When I had this free time in the mornings, did I relax?  Well... before I get to relax, I had to tackle a list of things to clean around the house.  Neglect around the house after three kids can get to a really disgusting state.  So I feverishly cleaned the house nonstop for 2 mornings straight. 

I got behind in documenting some recipes.  I had also meant to take pictures of our Easter dinner, but we got so hungry and devoured it before I even thought of getting out the camera!  I'll try again next Easter. 


Last week, I cooked bacon while I was cleaning the house.  Rather, I baked bacon!  I stumbled across this technique last year from Food Network's Barefoot Contessa and had to try it.  Our family LOVES bacon but I must admit, I find it a tedious task of slaving over the stove and being splattered with bacon grease.  I worry about Baby getting splattered with hot bacon fat.  It's bad enough while she is screaming for my attention, but even worse if she is screaming in pain from the splattering grease.  

This is the only way I will make bacon, as it is so EASY!  I wish I discovered this technique earlier.

I used a 500g or 1lb package of bacon and put it on a parchment-lined pan.  I bought a huge commercial sheet pan (16" x 22") at my local kitchen store and it worked perfectly for 1 package of bacon.  Before I bought my huge pan, I used 2 cookie sheets. 


The slices of bacon were placed side-by-side.  It's OK to have the edges touch as bacon shrinks while it cooks.  Bake at 400F for about 15-20 min. 

I usually turn on the oven and then put the pan of bacon in the oven before it hits 400F. 


After about 15 minutes, I check on the bacon.  The recipe doesn't say to flip them over but I do it anyways and check every 5 minutes until desired crispiness. 


A few more minutes and it's almost done!


Barefoot Contessa's Oven Roasted Bacon

1 500g (1lb) package of your favourite bacon

Preheat oven to 400 degrees Fahrenheit.
Place a sheet of parchment paper on a sheet pan.
Lay the bacon on top of the parchment paper.
Bake for 15 to 20 minutes until the bacon is really crispy.
Drain on paper towels and serve.

- Adapted from  Food.com: Barefoot Contessa's Oven Roasted Bacon


MMMMmmmmm....  YUMMY!  

Enjoy!


Pin It