Showing posts with label chocolate. Show all posts

Monday, September 23, 2013

Black Forest Mini Marshmallow Rainbow Cake

Wow, it has been too long since my last entry.  The summer has flown by so quick with the kiddies out of school.   At the end of July, I had eye laser surgery (PRK) to correct my nearsightedness.  It took 4 weeks to recover but it was well worth it!  

This month, it took a while to get into the rhythm of school, skating lessons, packing lunches, music lessons, church and loads of dishes and laundry!  

Black Forest Mini Marshmallow Rainbow Cake with Fresh Whipped Cream

Over the weekend, my youngest had her 4th birthday party.  I can't believe it!  My preemie baby will be turning 4 in a few days.  

We intended to have a small party with her preschool friends for 2 hours... but somehow ended up with 17 kids in our house on a rainy Saturday afternoon!  

Most of her preschool friends had siblings in the same class with my older kiddies, so they came too...and their parents.  I didn't have a headcount, but I think we had about 30 people at our home and we had a blast!     
    
Our birthday party menu included:  BBQ hot dogs, hamburgers, whiskey rum ribs (with Tanduay rum & Jack Daniels), gluten-free chicken burgers, gluten-free chicken dogs, oven roasted corn on the cob, chicken potstickers, potato salad, Cheetos, potato chips, chips & salsa, veggies & dip, fruit tray of watermelon, grapes & mandarin oranges and finally, cake! (Sorry, I was too busy hosting and forgot to take pics of all that food!)

Last year, I made a Chocolate Mini-Marshmallow Rainbow Cake and the Birthday Girl wanted it again.  To change things up, I used fresh vanilla whipped cream instead of chocolate and the cake was Black Forest Style.  

Everyone's waiting patiently for the candles and cake!
YUM!  The Black Forest Cake was a hit!  
So cute that the kiddies inhaled their first piece and came back for seconds!

I did not use any liqueur in the cake or filling since the kiddies were eating this.   I prefer to add a splash of kirsch or amaretto to the cherry pie filling for that "adult" taste. 

My KitchenAid mixer does not whip the cream stiff enough to pipe if there is too much heavy cream.  To overcome this, I whipped the cream in two small batches to get that stiff piping consistency (no more than 1.5 cups heavy cream).  Make sure your bowl and beaters are chilled, so the cream whips faster and sturdier for piping.  The cornstarch content in icing sugar helps stabilize the cream if kept cold.  

Black Forest Mini Marshmallow Cake

1 favourite chocolate cake (can be homemade or a box)*: 1 double layer 8 or 9-inch cake, 1 triple layer 8-inch cake, 1- 9x13 cake (baked in 2 pans for double layer)
1 can cherry pie filling
2 cups heavy cream (2.5 cups heavy cream for triple layer cake, 3 cups for double layer 9x13 cake)
3 Tbsp confectioner's/icing sugar  (6 Tbsp icing sugar for triple layer, 8 Tbsp for 9x13)
2 tsp vanilla (2.5 tsp vanilla for triple layer, 3 tsp for 9x13)

Prepare chocolate cake and cool completely.

Whip half the amount of heavy cream with half of the confectioner's/icing sugar and half the vanilla for at least 3 minutes on high until the cream is stiff enough for piping.  Be careful not to overwhip the cream (mixture will separate and become butter!).

Place one cake layer on a cake plate.  Spread the cake with whipped cream and spoon cherry pie filling on top of the cream, in the middle of the cake.  Add the cherry pie filling until it reaches 1-inch away from the edge.  This will prevent the cherries from oozing from the sides of the cake.  

Repeat with the remaining cake layer.  Whip the remaining heavy cream, icing sugar and vanilla.  Frost and pipe the cake as desired with the whipped cream.  Decorate with mini marshmallows, candies, shaved chocolate or your favourite cake decorations as desired.  

* I scaled 1.5X of my family's favourite chocolate cake recipe for a taller 9x13 double layer cake

Note: This can also be made in the style of "White Forest Cake" by using your favourite white or yellow cake instead of chocolate. 

The Birthday Girl with Mommy & Daddy
The Birthday Girl was EXHAUSTED, but still had enough energy to nibble on her goodie bag treats while resting... 

Happy 4th Birthday, Sweetheart! 

Enjoy!
Pin It

Thursday, June 13, 2013

Double Chocolate Chip Smarties Cookies

I wanted to bake something chocolatey!  I dug around my pantry and found a box of Smarties (candy covered chocolate buttons), random small bars of white and dark chocolate, some chocolate coins and a few Hershey kisses.  I chopped all the chocolate up and ended up with 3/4 cup of mixed chocolate chunks.  The original recipe calls for 2 cups of chocolate chips.  I didn't have enough chocolate chips, so I topped each cookie with a Smartie.  I don't think anyone noticed that I used less than half of the amount of chocolate chips!  


We had a play group last night.  I thought it would be nice to bring an after dinner treat.  Due to my food allergies, I have not tasted this recipe before!  I put all my trust onto my kiddies.  Yes, my "quality control team" consisted of a 3, 5 and 8-year old.  They said they were good and that was enough for me!  


This recipe was quick and easy to make.  The true test was when the kiddies at the play group wanted to have a second cookie right after they inhaled the first one!  I think putting a Smartie onto each cookie really added some "kiddie pizzaz" to the presentation.  

Whew!  The cookies passed "quality assurance" with flying colours! 

Double Chocolate Chip Smarties Cookies
makes about 4 dozen

1 cup butter, softened (I used non-hydrogenated soft margarine)
1 cup white sugar
1/2 cup brown sugar
2 eggs
2 teaspoons vanilla extract
2 cups all-purpose flour
2/3 cup cocoa powder
3/4 teaspoon baking soda
1/4 teaspoon salt
2 cups semisweet chocolate chips (I only used 3/4 cup mix of white, milk & dark chocolate chunks + 1 Smartie candy on top of each cookie)
Smarties, optional (1 for each cookie, if desired)

Preheat oven to 350F

In large bowl, beat butter, sugar, eggs and vanilla until light and fluffy.  Combine the flour, cocoa, baking soda and salt; stir into the butter mixture until well blended.  Mix in chocolate chips.  Drop by rounded teaspoonfuls onto ungreased cookie sheets.  (Decorate cookies with candy, if desired).  

Bake for 8 to 10 minutes in preheated oven, or just until set.  Cool 5 minutes on the cookie sheets before transferring to wire racks to cool completely.  

- Adapted from Chocolate Chocolate Chip Cookies I


We didn't have very many cookies left over.  I used a 1" cookie scoop and ended up with 56 cookies.  I brought 3 dozen to the playgroup, gave away 1 dozen and packed a few for school lunches.  After less than 24 hours, I only have 3 cookies left!  Just enough for each kiddie to enjoy after school with a cold glass of milk.  

Enjoy!

Pin It

Saturday, December 22, 2012

Vanilla Christmas Mini Donuts

Over the past few weeks, I have baked over 350 Christmas mini donuts!  This month, I have brought a batch of 70 mini donuts to a few Christmas parties.  They are bite sized, very cute and easy for little kiddies to eat.  Even if the children do not like them, there is very little to waste. Each pan only takes about 5 minutes to bake and they cool very quick.


Yesterday, my son had a small gift exchange and we had to bring 22 small gifts for his classmates. I wrapped about 30 small packages of 3 mini donuts with clear plastic wrap, tied with a ribbon. The extra gifts went to the principal, staff and teachers.


I love buying different kinds of sprinkles for decorating. Who doesn't like a splash of colour in their baking?

I made a slight variation of my mini donut recipe.  I omitted the nutmeg and used buttermilk instead.  When I ran out of buttermilk, I used 1 Tbsp lemon juice and 3/4 cup milk.  These made the mini donuts very fluffy and moist.  I filled the batter into a piping bag fitted with a Wilton 12 round circular tip.   It took a mere minutes to pipe the batter in 4 mini donut pans.  


Vanilla Christmas Mini Donuts 

2 cups all-purpose flour
3/4 cup white sugar (I use 1/3 cup brown sugar & 1/3 cup white)
2 teaspoons baking powder
1 teaspoon salt
3/4 cup buttermilk or 3/4 milk with 1 Tbsp lemon juice
2 eggs, beaten
1 teaspoon vanilla extract
2 tablespoons melted butter 

Preheat oven to 325 degrees F (165 degrees C). Lightly grease a mini donut pan. 
In a large bowl, mix flour, sugar, baking powder and salt. Stir in milk, eggs, and vanilla. Beat together.  Add melted butter.  MIx until well blended.

Fill each donut cup approximately 1/2 full. Bake about 5 minutes in the preheated oven, until donuts spring back when touched. Allow to cool slightly before removing from pan. 

Decorate with melted chocolate or candy melts and sprinkles, as desired.
- Adapted from Allrecipes.com: Fluffy Cake Doughnuts


Enjoy!

Pin It

Wednesday, September 26, 2012

Mini-Marshmallow Rainbow Cake with Chocolate Whipped Cream Frosting

My youngest had her 3rd birthday party this weekend.  Where did the time go?  She wanted chocolate cake for her birthday so I used my tried and true chocolate cake recipe.  I scaled the recipe 1.5 times to make a 2-layer 9"x13" cake.  I thought that a Mini-Marshmallow Rainbow Cake with chocolate whipped cream would be really cute for a preschool birthday party.  


It was a fun cake to put together when the children were in bed!  Growing up, I was never the artistic type. I can't draw but I can pipe borders and put stuff on a cake.  The mini-marshmallows made the cake so cute! I was even able to hide my messy icing skills with a border of marshmallows on the bottom of the cake.    

My kiddies do not like buttercream frosting.  They complain that it is too sweet but they adore whipped cream.  I knew the cake was a hit when the kiddies inhaled their cake and asked for a seconds before everyone had their first piece!  

This chocolate whipped cream is a variation of my vanilla whipped cream.  I was inspired by our local Swiss bakery's chocolate mousse cake:  chocolate sponge cake with chocolate mousse filling.  This is my basic chocolate whipped cream recipe.  Sometimes I use a tablespoon more icing sugar if the cocoa powder is bitter or strong.  It depends on the brand of cocoa powder and how sweet/bitter you like the frosting.  I always taste and adjust the frosting to make sure it is not too bitter.  I made and decorated the cake the night before.  I noticed that the cocoa made the frosting look darker the next day.  


Chocolate Whipped Cream Frosting

1 cup heavy cream
3 Tbsp. cocoa powder
1/2 cup powdered/icing sugar (or to taste)
1/2 tsp. vanilla

Beat heavy cream, icing sugar, cocoa powder and vanilla in chilled medium bowl with electric mixer on high speed until soft peaks form.  (I beat the cream until it it looks stiff enough to pipe, being careful not to over-whip.)

Betty's Tip: Well-chilled cream will whip the best, so keep it refrigerated until ready to use. It also helps to chill the bowl and beaters before you begin. When the cream begins to thicken as you beat it, reduce the mixer speed so you can watch carefully and beat just until soft peaks form. Overbeaten cream will look curdled.


- Adapted from Betty Crocker's Sweetened Whipped Cream 

Be careful not to over beat the whipped cream,  it might turn into butter!  I like using icing sugar because it has cornstarch in it.  The cornstarch helps stabilize the whipped cream so it can retain its shape when piped.   

To frost a 9x13 double layered cake:

I always make the chocolate cream in two batches.  I found that I can only whip no more than 1.5 cups of heavy cream at a time for best results in my KitchenAid stand mixer.  Also, whipped cream melts quick in a hot kitchen!  

The first batch: 1.5 cups heavy cream, 4.5 Tbsp cocoa powder, 3/4 cup icing sugar and 3/4 tsp vanilla.  After I filled and frosted the first batch, I put the cake in the refrigerator while I make the second batch.

Second batch:  1 cup heavy cream, 3 Tbsp cocoa powder, 1/2 cup icing sugar and 1/2 tsp vanilla.  It makes enough cream to frost the rest of the cake and pipe a border around the perimeter.  


The cake was a hit!  I served each piece of cake with an extra handful of mini marshmallows.  
My birthday girl was soooo happy!  Happy 3rd Birthday, Sweetheart!  

Enjoy!
Pin It

Thursday, May 17, 2012

100% Whole Wheat Chocolate Chip Cookies

Here is another classic treat in our household:  whole wheat chocolate chip cookies.  I used the famous Toll House cookie recipe and changed it a little.  I couldn't help myself. I made them with whole wheat flour!  


I have seen many chocolate chip cookie recipes that use a blend of whole wheat and all-purpose flour.  Instead, I used all whole wheat flour and omitted the salt. 

Ever since I made them 100% whole wheat, it has been my reliable and most trustworthy chocolate chip cookie recipe for over 5 years.  The true test was when I made these cookies for my son's 4th birthday party, over 3 years ago.  I baked these cookies and the children ate them without noticing that they were whole wheat!  
  
It helped that I put one Smartie candy in the middle of each cookie.  No complaints at all!  They still have loads of fat and sugar, so consider them a heartier treat. 

  
Whole Wheat Chocolate Chip Cookies

2 1/4 cups whole wheat flour
1 teaspoon baking soda
1 cup (2 sticks) butter, softened (I used 1 cup soft non-hydrogenated margarine)
3/4 cup granulated sugar (I used 1/2 cup granulated sugar)
3/4 cup packed brown sugar (I used 1 cup brown sugar)
1 teaspoon vanilla extract
2 large eggs
2 cups (12-oz. pkg.) chocolate chips (I used 1 cup chocolate chips)
1 cup chopped nuts (optional, I omitted)
Preheat oven to 375° F.

Combine flour, baking soda and salt in small bowl. Beat butter, granulated sugar, brown sugar and vanilla extract in large mixer bowl until creamy. Add eggs, one at a time, beating well after each addition. Gradually beat in flour mixture. Stir in chocolate chips (and nuts, if using). Drop by rounded tablespoon onto ungreased baking sheets.  At this point, I added 1 Smartie candy to each cookie before baking. 

Bake for 9 to 11 minutes or until golden brown. Cool on baking sheets for 2 minutes; remove to wire racks to cool completely.  

 
Within a day, they were all gone!  We ate some and then shared the rest with our wonderful friends.  
Can you find the cookie with the hidden wink and smile?

Enjoy!
Pin It

Friday, March 23, 2012

Baked Mini Donuts

There are only a few more days of Spring Break vacation left and I thought it would be nice to make a happy treat...with SPRINKLES!  


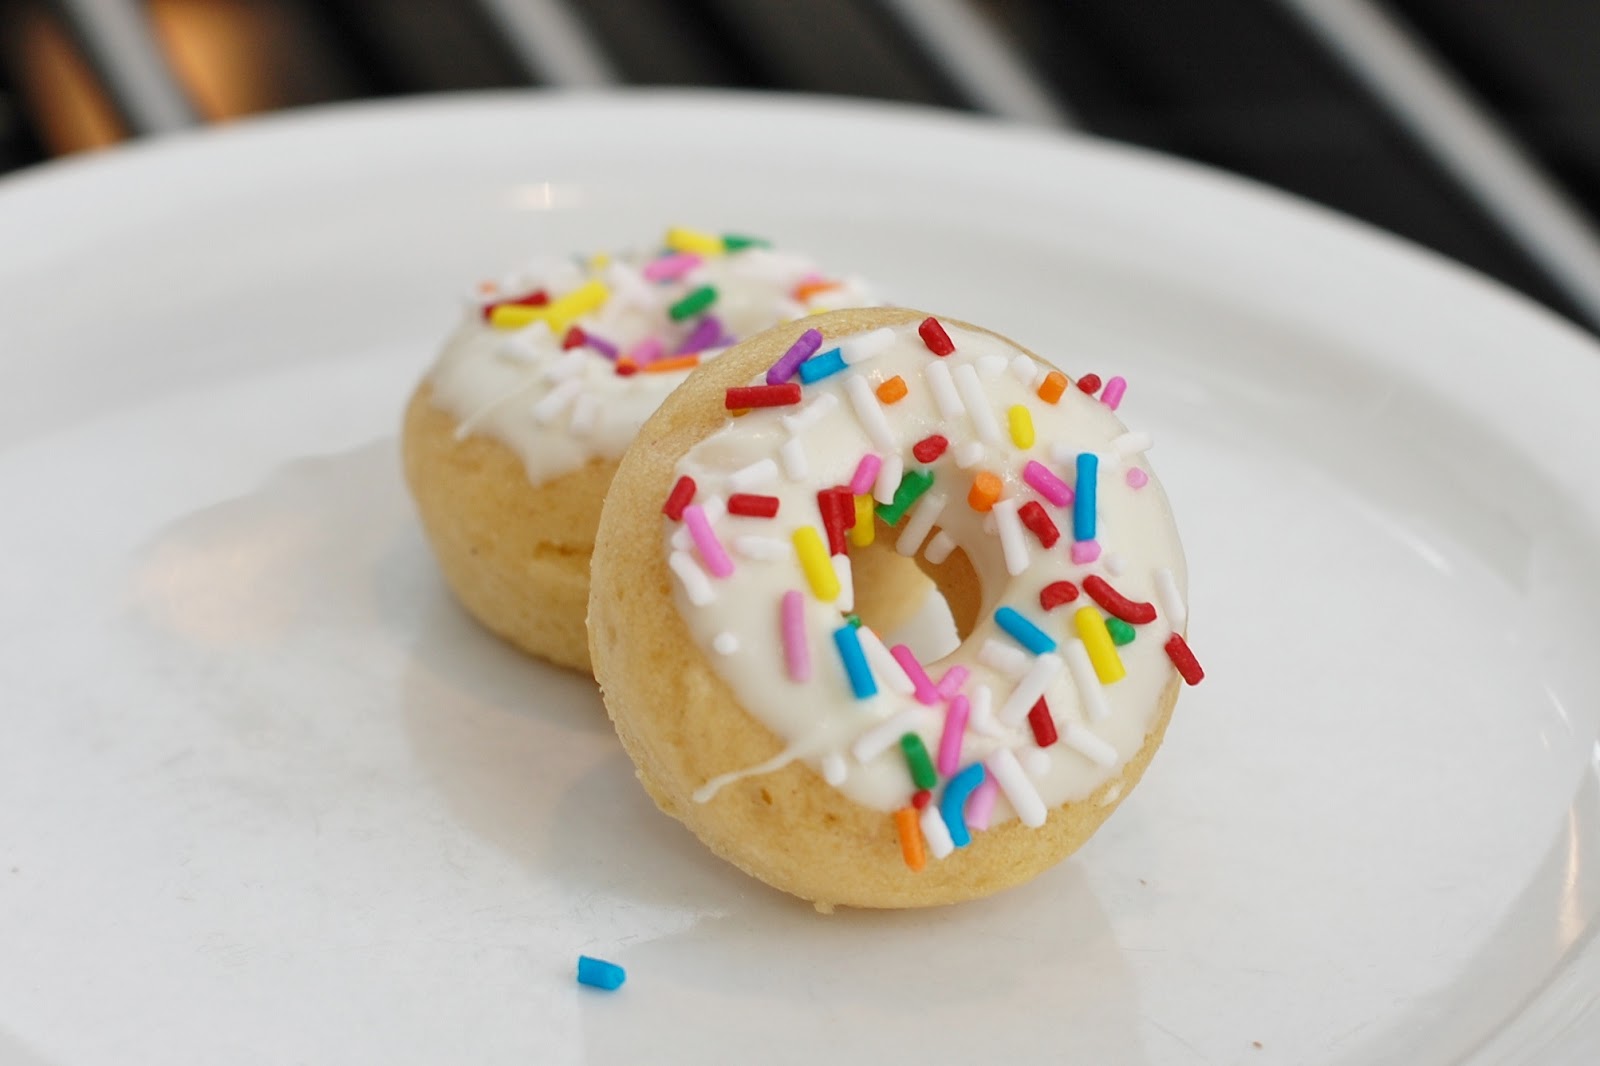
Baked mini donuts with sprinkles!  I am not brave enough to deep fry stuff so I bought 2 Wilton mini donut pans from Amazon.ca.  Each pan makes 12 small 1 1/2-inch mini donuts; perfect for the little hands in our household.  I would rather the kids eat a few of these than eat a few bites of a big one and leave it to waste (or mommy to finish). 

Using a piping bag, I was able to make 7 1/2 dozen mini donuts from this recipe. Since they are so fun to make, I will order 2 more pans.  The pans are not cheap (by my standards) at $16.99 each but factored over 5 years of school treats, playdates and potlucks, it's quite reasonable.  I am hoping that the pans last at least 5 years!  

The pan appeared to be a solid, high quality product and the non-stick finish felt pretty durable.


I didn't want to take any chances with sticking, so I brushed the cavities with softened butter.


I dumped all the ingredients into my KitchenAid mixer and mixed it up on medium speed until a batter formed. Then I put the batter in a pastry/piping bag for cake decorating.  The cavities were pretty small, so piping the batter made the whole process quick and effortless.   


The cavities were not quite filled with halfway and when baked for 4 minutes, they puffed up nicely to a perfect donut shape.   


Removing the donuts from the pan required a little bit of patience.  I used a butter knife to delicately lift each one out.  There were a few that didn't release immediately, so I waited a few minutes and then it slipped out.  Patience is the key!


My kiddies saw me take the first batch out and then immediately inhaled a dozen!  I still needed to decorate them with some melted chocolate and sprinkles!


If I was to dip over 70 mini donuts, I needed a chocolate product that would dry quickly and be easy to melt and dip.  Wilton's Candy Melts were very nice to use.  I followed the microwave instructions and they melted in a matter of minutes.  I also used "melting wafers" from the bulk section of my grocery store and they were good too.  Chocolate chips were not designed to melt easily.  Rather, they were meant to retain their shape at a high temperature. The melted chocolate chips were too thick and gooey to dip efficiently, so I prefer candy melts or melting wafers.

Baked Mini Donuts

2 cups all-purpose flour
3/4 cup white sugar (I use 1/3 cup brown sugar & 1/3 cup white)
2 teaspoons baking powder
1/4 teaspoon ground nutmeg
1 teaspoon salt
3/4 cup milk
2 eggs, beaten
1 teaspoon vanilla extract
2 tablespoons melted butter 

Preheat oven to 325 degrees F (165 degrees C). Lightly grease a mini donut pan.
In a large bowl, mix flour, sugar, baking powder, nutmeg and salt. Stir in milk, eggs, vanilla and butter. Beat together until well blended.  

Fill each donut cup approximately 1/2 full. Bake 4 minutes in the preheated oven, until donuts spring back when touched. Allow to cool slightly before removing from pan. 

- Adapted from Allrecipes.com: Fluffy Cake Doughnuts


Don't these look scrumptious?


White melting wafers from the grocery store's bulk section.  Yes, the sprinkles make me happy!  


  Enjoy!


  Pin It

Wednesday, February 22, 2012

Chocolate Oreo Cupcakes

Ahhh... chocolate cupcakes... the staple of our family's birthday party repertoire.  I find that whenever someone has a birthday, I end up making several cakes and cupcakes to mark that special day.  If the kiddies have a birthday on a school day, then I make cupcakes.  Then I make a cake to celebrate with extended family members on the weekend for a family party.  On the actual day of the birthday, we celebrate again with the "real" birthday cake.  That's a lot of cake!!! 

We could be eating 3 different kinds of cake/cupcakes for a week!  It gets interesting if we have a 3 birthdays over a period of 2 months when the girls and daddy have birthdays in September and October!  After that binge, we are happy to go without goodies until Christmas.  This gives me a break from cake and we focus on Christmas treats instead.

Last month, my son had just turned 7 years old and wanted chocolate oreo cupcakes to take to his class for his birthday...again.  I made this last year and I guess it was a hit! 

This is the most kid-friendly moist chocolate cake recipe I stumbled across.  It makes a wonderful chocolate cake and for big and small kids, it makes a scrumptious, moist cake.  The batter is very runny, but somehow it works and becomes a beautiful cake begging for frosting, or whipped cream.  It is the perfect base for a black forest cake.  In place of the boiling water, you can use coffee for a deeper, almost black colour and flavour. 


Extreme Chocolate Cake

2 cups white sugar
1 3/4 cups all-purpose flour
3/4 cup unsweetened cocoa powder
1 1/2 teaspoons baking soda
1 1/2 teaspoons baking powder
1 teaspoon salt
2 eggs
1 cup milk
1/2 cup vegetable oil
2 teaspoons vanilla extract
1 cup boiling water, or coffee (decaf for kiddies). 

Preheat oven to 350 degrees F (175 degrees C). Grease and flour two 9 inch cake pans, or 1 9"x13" pan, or  36 cupcakes, half filled (they rise considerably).               

Use the first set of ingredients to make the cake. In a medium bowl, stir together the sugar, flour, cocoa, baking soda, baking powder and salt. Add the eggs, milk, oil and vanilla, mix for 3 minutes with an electric mixer. Stir in the boiling water by hand. Pour evenly into the two prepared pans.

Bake for roughly 15-20 min for the cupcakes, 30 to 35 minutes for 9" pan, 40-50 min for 9"x13" pan in the preheated oven, until a toothpick inserted comes out clean. Cool for 10 minutes before removing from pans to cool completely.
                                   
Split the layers of cooled cake horizontally, cover the top of each layer with frosting, then stack them onto a serving plate. Frost the outside of the cake.

- Adapted from http://allrecipes.com/recipe/extreme-chocolate-cake/

For luscious, whipped fluffy frosting, I followed a vegan frosting recipe.  For that soft, fluffy frosting that stays the same in the fridge, I used regular soft margarine instead of butter.  Also, the trick is in the beating of the frosting.  I used my KitchenAid mixer and it worked a charm.  Adjust the sugar for sweetness. 

Fluffy Vanilla Buttercream Frosting

1/4 cup shortening
1/4 cup nonhydrogenated margarine (I used Western Family Soft Margarine, not light)
1 1/2-3/4 cups powdered sugar, sifted if clumpy 
3/4 teaspoons vanilla extract
2 Tbsp milk (1% or homo, whatever I have in the house)

Beat the shortening and margarine together until well combined and fluffy. Add the sugar and beat for about 3 more minutes. Add vanilla and milk, and beat for another 5 to 7 minutes until fluffy.

 Adapted from http://www.chow.com/recipes/10856-vegan-fluffy-buttercream-frosting


How do I pipe the frosting into luscious, irresistable swirls?  My best friend bought me
a cake decorating kit complete with pastry bag and decorating tips.  I didn't have the classic "1M Wilton tip" for perfect cupcakes but I was able to find it at my local kitchen store.

Make sure it is compatible with your pastry bag.  You may need a coupler or a smaller pastry bag, or just use the tip in a ziplock sandwich baggie.

This is the THE frosting cupcake tutorial that started it all!  It explains all you need to make your cupcakes look amazing!  I've had someone ask me if I bought the cupcakes and boy, was she surprised when I told her I made them from scratch. 

I topped it with a mini oreo cookie, just to finish it off. 


Enjoy! 


Pin It