Wednesday, December 26, 2012

White Amaretto Fruitcake

Merry Christmas and Happy Boxing Day!  We wish you all Joy, Peace and Happiness!  We are truly blessed with wonderful friends and family from all over the world.  


Every family celebrates this holiday season differently with their own set of festive traditions.  One Christmas tradition I started several years ago was to make a white Christmas fruitcake flavoured with Amaretto (a sweet, almond-flavoured Italian liqueur) and brandy.   Fruitcake is not for everyone.  I know that store bought dark fruitcake is not for me.  When I tried the home made stuff for the first time, I was hooked!  Almost 15 years later, I finally took the plunge and made it myself.  The children LOVE this!  Although there is alcohol, it is cooked off and I serve the fruitcake in small, thin slices.    

I know my children will continue this tradition.  They are the reason why I blog.  I write all my recipes here so that one day when they are older, they can have access to all our family favourite recipes.  This is also a great way to sharing my recipes with friends and family.  

There are many fruitcake recipes out there, but this will always be their "Mom's".  I know how difficult it is to locate lost recipes, so I am making it easier for them to find. 


This recipe uses a few measurements in ounces.  I tried to convert the measurements to cups but found it easier to use a digital kitchen scale.  If you like to bake and cook, I highly suggest a food scale if you do not have one.  It takes the guesswork out of recipes that have ingredients measured by weight instead of volume.   


I think the key ingredients are brandy and Amaretto.


I used my digital kitchen scale to measure the fruit easily.  I dumped the fruit mix according to the scale.  Then I reset the scale to zero with the contents and added the cherries to the amount of weight needed.  


Marinate the fruit with brandy and Amaretto overnight.


Grease the pans and line with parchment paper.  I used a mini loaf pan and 1- 7" x 3" pan. 


Coat the fruit with 1/2 cup flour and toss in the whole blanched almonds.


Start the batter by creaming the butter and margarine with sugar.


Add the dry and wet ingredients alternately to make a thick batter.  


Stir in the fruit and nut mixture.  With all the fruit, nuts and batter, this mixture can be stiff and hard to mix together.  A stand mixer is highly recommended.


Place the filled pans in the oven along with a pan of water underneath.  I baked the smaller loaves for about 1 hour and the larger loaf for about 2 hours, until the top was golden brown and toothpick came out clean.

  
The mini loaves turned out so cute and perfect for gift giving! 

White Amaretto Fruitcake

Fruit:
1 1/2 cups golden raisins
12 oz deluxe holiday fruit mix*
8 oz candied red cherries
4 oz candied green cherries
1/4 cup brandy
1/4 cup Amaretto 

Cake:
1/2  cup all purpose flour
4 oz whole blanched almonds
1/2 cup butter 

1/2 cup margarine or shortening (I used non-hydrogenated soft canola margarine)
1 cup granulated sugar
4 eggs
1 tsp almond extract
2 1/2 cups all purpose flour

1/4 cup brandy
1/4 cup Amaretto
1/4 cup milk
2 oz ground almonds


DAY 1: Cut candied pineapple into 1/2" pieces.  Place pineapple, raisins, peel and whole cherries in a large bowl.  Pour 1/4 cup each of brandy and Amaretto over top. Mix throughly, cover and leave overnight.

DAY 2: Preheat oven to 275F. Grease a 6½ and a 5" round fruit cake pan, or any suitable baking pans that will hold at least 12 cups batter. Line the pans with parchment paper and grease the paper. Sprinkle ½ cup flour over the fruit mixture, and toss to coat fruit. Mix in whole nuts.


Place ½ cup each of butter & shortening in a large mixing bowl. Beat together until creamy. Gradually beat in the sugar, eggs, then the flavourings. Add 1 teaspoon almond extract. Add about ¾ cup of flour, beating just until mixed. Beat in the brandy & Amaretto. Add another ¾ cup of flour, beating just until mixed. Beat in the milk and remaining ¾ cup flour. Then stir in the almonds. Pour over the fruit and nut mixture and stir until combined.


Turn into the prepared cake pans and smooth the top. Place a pan containing water on the bottom rack of the oven. Bake cakes in the centre of preheated oven for 2 - 3 hours. Remove from oven, let cool in pans on a rack for 15 - 20 minutes. Then remove from the pans; peel off paper and cool completely. Wrap cakes well and let ripen for 3-4 weeks in the refrigerator or freeze.  


Makes 2 round cakes or 2-3 loaves.  (I made 8 mini-loaves and 1 medium loaf)

* you can also substitute the holiday fruit mix with 4 oz diced candied citron peel and 8 oz candied yellow pineapple

- Adapted from Dave's Garden Cookbook: Amaretto Fruitcake


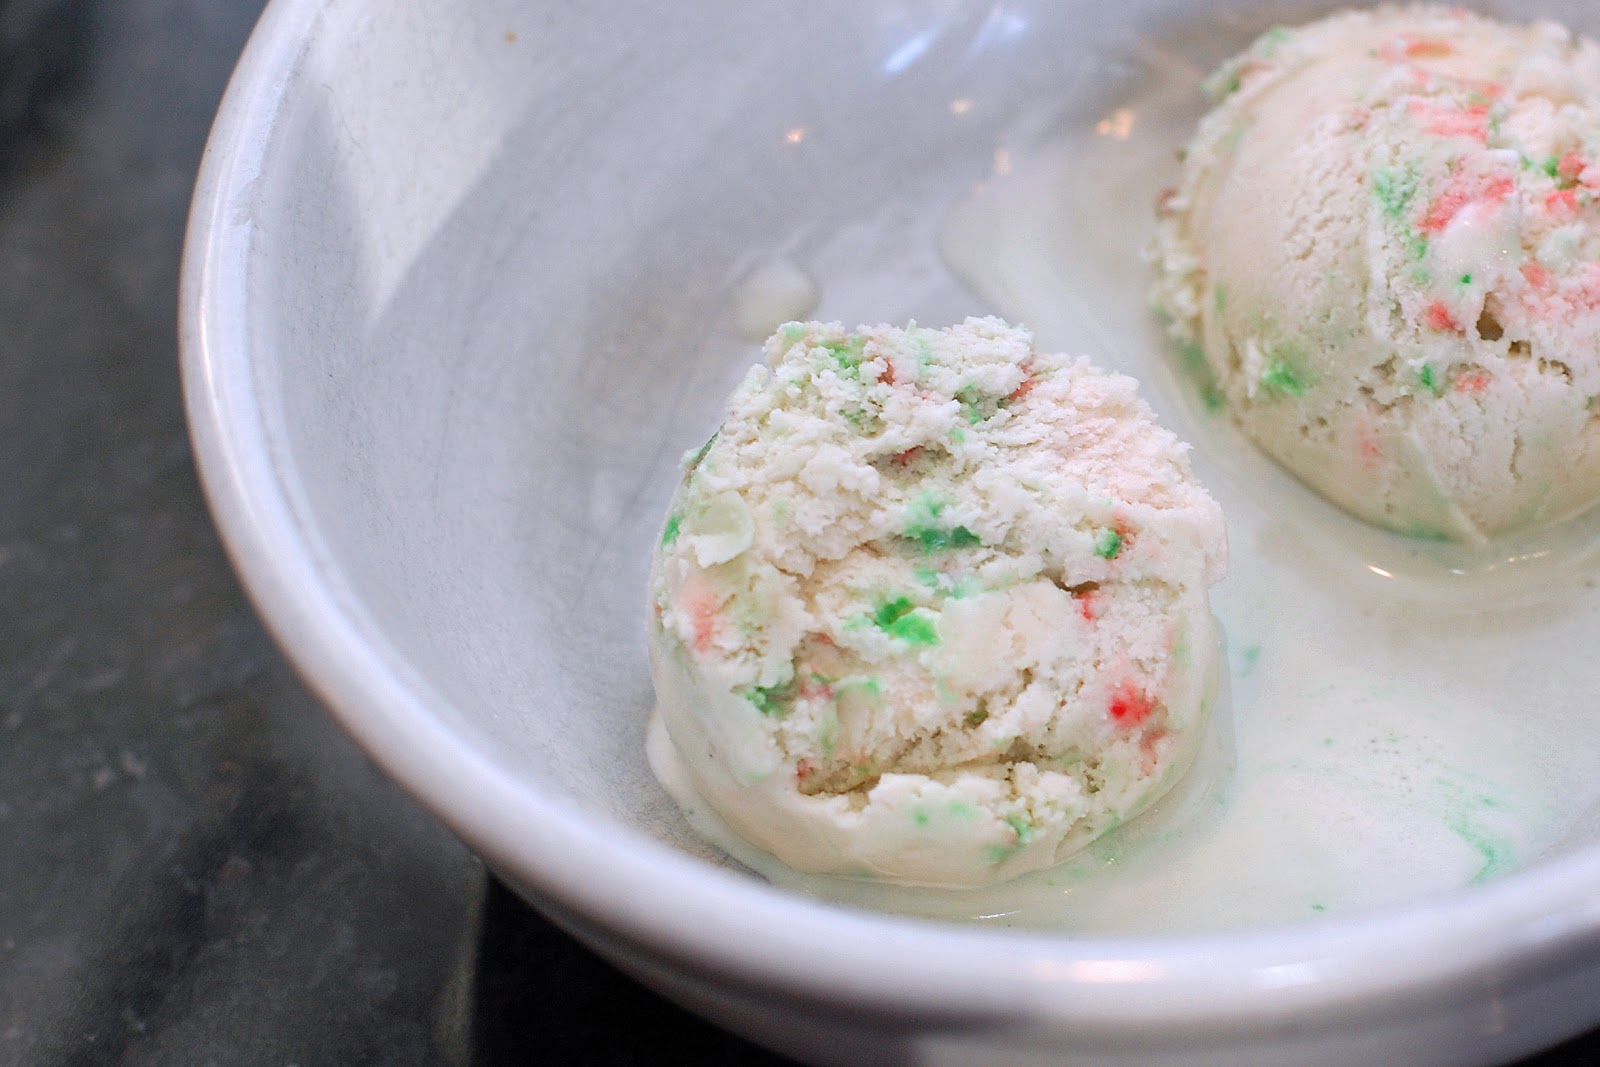
I usually cut them into thin, bite sized slices.  Very festive with the vibrant colours, addictive texture and almond Amaretto flavour!  Perfect for holiday sharing. 

Enjoy! 
Pin It

Monday, December 24, 2012

Candy Cane Ice Cream

Merry Christmas Eve!  I can't believe how quick Christmas has come up.  At the grocery store, I saw some candy cane ice cream and thought that it would be a great dessert idea for Christmas dinner.  We can't forget dessert!  


The kiddies brought home candy canes from school and other activities.  Usually, we put them on the tree.  Yes, I am one of those moms that do not let their kids eat candy yet.  By all means, we do eat junk food:  chips, cake, cookies, ice cream, pastries, sweets, etc.  I thought that having candy cane ice cream is a nice treat so they can have their Christmas candy canes, but in smaller amounts.  

I used my Mint Oreo Ice Cream as a starting point for my candy cane ice cream.  Instead of Oreo cookie chunks, I used crushed candy canes.  I used a combination of green/red candy canes (raspberry flavoured) and some regular mini ones.  In total, I had 4 Tbsp of finely crushed candy canes.  I had the girls break the candy canes up and put it in a zipped sandwich bag.  I crushed them with the flat side of my meat tenderizer/hammer on a cutting board on the floor.  It was so much fun! 

Candy Cane Ice Cream
makes about 4 cups

4 Tbsp finely crushed candy canes
1/2 cup pasteurized liquid egg (or 2 large eggs)
3/4 cup sugar [Edited to add sugar]
2 cups whipping cream
1 cup milk (I use organic whole milk)
2 teaspoons peppermint extract

Whisk the eggs in a mixing bowl until light and fluffy, 1-2 minutes. Whisk in the sugar, a little at a time, then continue whisking until completely blended, about 1 minute more.

Pour in the cream and milk and whisk to blend.  Add the peppermint extract blend again. Transfer the mixture to an ice cream maker and freeze following manufacturer's instructions. After the ice cream stiffens, about 2 minutes before it is done, add the crushed candy canes, then continue freezing until the ice cream is ready.

- Adapted from Ben & Jerry's Mint Oreo Ice Cream
 

Have a wonderful Christmas Eve!

Enjoy!
Pin It

Saturday, December 22, 2012

Vanilla Christmas Mini Donuts

Over the past few weeks, I have baked over 350 Christmas mini donuts!  This month, I have brought a batch of 70 mini donuts to a few Christmas parties.  They are bite sized, very cute and easy for little kiddies to eat.  Even if the children do not like them, there is very little to waste. Each pan only takes about 5 minutes to bake and they cool very quick.


Yesterday, my son had a small gift exchange and we had to bring 22 small gifts for his classmates. I wrapped about 30 small packages of 3 mini donuts with clear plastic wrap, tied with a ribbon. The extra gifts went to the principal, staff and teachers.


I love buying different kinds of sprinkles for decorating. Who doesn't like a splash of colour in their baking?

I made a slight variation of my mini donut recipe.  I omitted the nutmeg and used buttermilk instead.  When I ran out of buttermilk, I used 1 Tbsp lemon juice and 3/4 cup milk.  These made the mini donuts very fluffy and moist.  I filled the batter into a piping bag fitted with a Wilton 12 round circular tip.   It took a mere minutes to pipe the batter in 4 mini donut pans.  


Vanilla Christmas Mini Donuts 

2 cups all-purpose flour
3/4 cup white sugar (I use 1/3 cup brown sugar & 1/3 cup white)
2 teaspoons baking powder
1 teaspoon salt
3/4 cup buttermilk or 3/4 milk with 1 Tbsp lemon juice
2 eggs, beaten
1 teaspoon vanilla extract
2 tablespoons melted butter 

Preheat oven to 325 degrees F (165 degrees C). Lightly grease a mini donut pan. 
In a large bowl, mix flour, sugar, baking powder and salt. Stir in milk, eggs, and vanilla. Beat together.  Add melted butter.  MIx until well blended.

Fill each donut cup approximately 1/2 full. Bake about 5 minutes in the preheated oven, until donuts spring back when touched. Allow to cool slightly before removing from pan. 

Decorate with melted chocolate or candy melts and sprinkles, as desired.
- Adapted from Allrecipes.com: Fluffy Cake Doughnuts


Enjoy!

Pin It

Thursday, December 20, 2012

Chewy Coconut Cookies

I have been trying to catch up on my Christmas baking, but alas, EVERYTHING has been eaten up!  I made chewy coconut cookies the other day.  When my son came home from school, he was so excited to see a pile of them cooling on a wire rack.  With a glass of milk in one hand, he proclaimed that the cookies were SO GOOD.


It's a relief that they turned out good since I was planning to take them to a friend's house.  The taste of coconut is not for everyone.  My mother is not particular with coconut but we LOVE it.  

These cookies remind me of the Chinese coconut tarts sold in Chinese bakeries in Vancouver.  They taste like the filling without all the work of making the tarts! 

I have been making these cookies for over a year..  It is a nice change from chocolate chip or oatmeal raisin cookies.  I am not sure if they are "kid-friendly", since coconut is not a classic kiddie flavour.  My children adore this sweet and chewy cookie with crisp outer edges.  

Chewy Coconut Cookies
makes about 2 dozen

1 1/4 cups all-purpose flour
1/2 teaspoon baking soda
1/4 teaspoon salt
1/2 cup butter (I used soft non-hydrogenated canola margarine)
1/2 cup packed brown sugar (I used 1/3 cup)
1/2 cup white sugar (I used 1/3 cup)
1 egg
1/2 teaspoon vanilla extract
1 1/3 cups flaked unsweetened coconut

Preheat oven to 350 degrees F (175 degrees C.) Combine the flour, baking soda, and salt; set aside.

In a medium bowl, cream the butter, brown sugar, and white sugar until smooth. Beat in the egg and vanilla until light and fluffy. Gradually blend in the flour mixture, then mix in the coconut. Drop dough by teaspoonfuls onto an ungreased cookie sheet. Cookies should be about 3 inches apart.

Bake for 8 to 10 minutes in the preheated oven, or until lightly toasted. Cool on wire racks.

- Adapted from Allrecipes.com:  Chewy Coconut Cookies


Enjoy!
Pin It

Wednesday, December 19, 2012

Simple White (or Pink) "Easy as Cake Mix" Cupcakes


Last week, my husband took our children out for an evening at "Dads & Tots".  It is a free local program that gives fathers (uncles, or grandfathers) a chance to take their children for a fun playdate evening with pizza and snacks for dinner.  While they were gone, I missed them horribly.  So much, I made a batch of really easy and simple cupcakes as a surprise when they got home.  


This is a variation of my Easy Vanilla Cupcake and whips up very quick, much like a cake mix.  I think real buttermilk helps give the cupcake its soft and fluffy texture.  Regular milk can be used too.  If desired, white vanilla cupcakes be easily changed to a different flavor with a different extract and food colouring.   I only had enough batter to fill 12 muffin cups half full but they still rose nicely!  


For fun, I tried strawberry extract and made them pink with a few drops of red food colouring.  Oops... I guess I was a little too heavy handed and they turned out "too pink" with a very artificial strawberry flavour...but it was so much fun to experiment!! 


Out of curiosity, I tried regular non-hydrogenated soft margarine (pink cupcake) instead of softened butter with great results (e.g. .Fleischmann's, Becel).  Results using "light" soft tub margarine (vanilla cupcake) turned out slightly gummy but still OK, if that is all you have on hand.  Regardless, the cupcakes did not last very long!   

I topped them with a fluffy, cooked flour frosting, flavoured with strawberry extract.  

Simple White "Easy as Cake Mix" Cupcakes
makes 12 large cupcakes or 1- 9" round single layer cake

2/3 cup sugar
1/4 cup butter, softened, (or non-hydrogenated soft margarine, regular or light)
1 egg
1 1/2 tsp vanilla (I used 2 tsp strawberry extract, I will use less next time)
1 cup all-purpose flour
1/8 tsp salt
1 1/2 tsp baking powder
1/2 cup milk or buttermilk (or 1/2 cup milk, mixed with 1 1/2 tsp vinegar or lemon juice)
few drops food colouring, optional

Preheat oven to 350 degrees F (175 degrees C). Line a muffin pan with paper liners or grease and flour a 9-inch cake pan.  

Pour buttermilk in a measuring cup and add vanilla (or other flavour extract) and salt.  

In a medium bowl, cream together the sugar and butter. Beat in the egg. Combine flour and baking powder.  Add alternating amounts of the flour mixture and the buttermilk-vanilla.  Mix until well combined and batter is smooth.

Add a few drops of food colouring, if desired.

For cupcakes, bake 13 to 15 minutes.  For 9-inch pan, bake about 20-25 minutes.  Cake is done when it springs back to the touch or when cake tester (toothpick) comes out clean. 

- Adapted from Easy Vanilla Cupcakes


Enjoy!

Pin It

Tuesday, December 11, 2012

Easy Chinese Cream Corn Egg Drop Soup

Chinese corn egg drop soup is very easy to make.  You can find this soup in Chinese restaurants and Chinese households. Growing up, my mother would make this for us on a regular basis.  It is one of those comfort dishes I fondly remember.  When I finally ventured to make this, I didn't realize how quick it is to whip up.   


Recovering from the stomach flu, this hit the spot.  The children adore the sweetness from the corn, the savory chicken soup base and swirls of cooked egg throughout the soup.   


A simple soup with basic ingredients:  a can of cream corn, an egg and chicken or vegetable broth.  I don't always have chicken broth on hand, so I usually use about 1/4 tsp chicken bouillon base with water.  I always have chicken bouillon cubes in my pantry.


Empty 1 can of cream style corn and add 1 can of water or broth in a medium pot. If using water, add about 1/4 tsp chicken bouillon cube.  


Crumble the chicken bouillon cube into the corn and water mixture.  Bring contents to a boil.  


While waiting for the soup to boil, beat 1 egg in a bowl, as if you are making scrambled eggs.   


*Important tip:  When the corn soup is boiling, turn the heat element off and take the pot off the heat.  Mix in a clockwise (or counter-clockwise, if you prefer!) and slowly pour the beaten egg in a thin stream.  Mixing in a circular fashion helps distribute the egg into pretty swirls through the soup.  The heat from the boiling soup will quickly cook the egg.  

Previously, I forgot to take the pot off the heat and the vigorous boiling broke the egg swirls into an "unappetizing egg mess".  The soup was still very tasty, but the eggs did not look pretty... they were pulverized from the rapid boiling.      


Look at the swirls of egg.  The egg also thickens the soup nicely.


Chinese Corn Egg Drop Soup

1 14 oz (398mL) can Cream Style Corn
1 equivalent can of water*, chicken broth or vegetable broth
*1/4 tsp chicken bouillon cube or powdered chicken stock, if using water
1 egg, beaten
Salt & pepper, to taste

In a medium pot, empty 1 can cream style corn and add 1 can of water or broth.  If using water, about 1/4 tsp crumbled chicken bouillon cube to the corn and water.  Bring soup mixture to a rapid boil. 

Beat 1 egg in a bowl.  Take the saucepan off the heat element when the soup has reached a rapid boil.  While mixing in a circular motion, slowly pour a thin stream of the beaten egg into the hot soup.  The mixing motion helps cook and swirl the egg into the soup. 

The soup is ready to serve when the egg is cooked.  

Season with salt and pepper, if needed.  


[Edited to add - Dec. 13, 2012] I'm so excited to share that this recipe has been featured on SayItCanada.ca!  Very happy to contribute this wonderful Canadian site.  They have a really neat Kids Corner with lots of neat activities and recipes!    

Enjoy!
Pin It

Monday, December 3, 2012

Happy December! Back from Vacation.

Happy December!  It has been almost a month since my last post.  November has been crazy busy.   We went off to our first "real" vacation as a family of 5.  It was the first time the girls got to fly on a plane (from Bellingham, WA to Los Angeles) and go on a Princess cruise down to the Mexican Riviera. We visited Puerto Vallarta, Cabo San Lucas and Ensenada, Mexico.  I must say that it was the perfect vacation -- despite travelling with 3 kiddies age 3, 5 and 7, a three hour flight delay and a fussy 3 year old that needed her nap in the mornings.  Being on the cruise ship, I didn't have to worry about meals, snacks, or anyone being hungry, since all the food was included. 

Now that we are back, we had to get back to the swing of our crazy schedules and somehow I got hit with the stomach flu.  Yes, I had non-stop diarrhea for 36 hours... to balance the great time I had on vacation.  To make everyone feel better, I will be VERY behind on Christmas preparations and baking!  

I just wanted to share some vacation and yummy food photos with my friends and family from around the world!  Also, when my kiddies read this entry when they are older, they can use this as a little travel diary from our spectacular trip. 

First, we had to drive down from Canada to Bellingham, WA and then fly to Los Angeles, where the cruise ship port is.  It was cheaper to fly out of the US than from Vancouver, Canada.


Approaching the US Border.  Peace Arch Park, Canada.  


Although we were delayed 3 hours, we managed to have a great 3 hour flight.  The girls' first plane ride.


We booked our vacation through our local travel agent.  Our travel agent ordered a wonderful surprise for our room!  A lovely plate of chocolate covered strawberries and a yummy plate of veggies and dip.  We were spoiled!


The first night, we had grilled salmon and veggies.  Cooked to perfection.


My son didn't want the kiddie menu (chicken nuggets & fries, etc), he wanted what the grownups had!


Enjoying our balcony.


Beautiful!  The Piazzo, with live classical music.  


The indoor pool at night.  


Every night, the dessert buffet had different delectable treats!  We were so spoiled!  There were even gluten-free options!  


The presentation of these desserts were so clean and beautiful. 


There were sponge cakes, tarts, cheesecakes, pavlovas, macarons...  Everything to suit the mood you were in!  Did we gain weight?  Oh, YES! 


In Puerto Vallarta, our first port, we walked a little off the beaten path to a supermarket chain called Soriana's.  It is Mexican owned and I wanted to see where the locals shopped instead of Walmart.  Look at all those dried chili peppers!  We don't have this at our markets in Canada.  


Of course, we had to look at the bakery section.  Even if you are in a Mexican supermarket, all goodies look universally delicious!


We took a taxi to downtown Puerto Vallarta to walk around.  Yes, I wore 30lb Baby in the Ergo carrier while I pushed Nessa in the humid 27C weather.  Baby needed her nap and wearing her was the best way for us while travelling.  


On the beach in Puerto Vallarta.  Yes, Baby is still napping!


The view of the famous rock formations in Cabo San Lucas from our balcony view.  


The children LOVED Medano Beach in Cabo San Lucas.  Mommy did too!


While the kiddies were in the Kids Club, Hubby and I had a brief moment to ourselves...until they paged me to get poor seasick Nessa.  Thank goodness we packed anti-nausea medication!


YUM!  Baked Alaska. Ice cream in any form is wonderful.


International Cafe.  Open 24 hours. We did not have to pay extra for salads, quiche, paninis, cheese plate, nuts, cookies and pastries.  The children LOVED the grilled paninis.


The International Cafe also had a lovely selection of pastries, cookies and desserts.  Hubby enjoyed the tall glasses of tiramisu.


Look at all those pastries!


Next to the 24 hr International Cafe is Alfredo's Pizzeria.  Gourmet thin crust pizzas made to order.  Delicious!


Finally a picture of the 5 of us on our First Formal Night.  So nice that everyone is sitting nicely and behaving properly.  My babies look so grown up.  I'm so happy that I was able to wear my evening gown again!  I wore it 9 years ago for our Honeymoon Cruise to Alaska.  The children had a wonderful time and made lots of great memories on this trip.  

Thanks for having a look at our vacation and food pics! 

Enjoy!
Pin It