Showing posts with label snacks. Show all posts

Wednesday, March 6, 2013

Carrot Apple Coconut Muffins

Another Snack Day approaches for Nessa tomorrow and I decided to make Carrot Apple Coconut Muffins from Weelicious.  It is such a great resource for healthy snacks and meals for toddlers, babies and the whole family.   


To make life easier, I used my Cuisinart food processor to grate the carrots and apple.  Earlier today, I used it to make some roasted garlic and sundried tomato hummus.  

 
This recipe makes 30 mini-muffins but I made 24 mini muffins (as per my mini muffin pan) and 6 regular sized muffins. After filling my mini muffin pan, I used the remaining batter to fill 6 regular sized muffins in 4 oz custard ramekins lined with paper muffin liners.  


Carrot Apple Coconut Muffins
makes 24 mini muffins + 6 regular sized muffins

  • 1 1/2 cups all purpose flour 
  •  (I used 1 cup whole wheat flour + 1/3 cup wheat germ + 2 Tbsp flaxseed)
  • 1 teaspoon baking powder
  • 1/2 teaspoon baking soda
  • 1/2 teaspoon salt
  • 1/3 cup milk (I used 1/3 cup sour cream)
  • 1/4 cup vegetable or canola oil
  • 1/2 cup honey 
  • 2 large eggs
  • 1 teaspoon vanilla extract
  • 2 carrots, peeled & grated, about 1 cup
  • 1 apple, peeled and grated, about 1/2 cup (gala, fuji, pink lady or red delicious are good choices)  (I forgot to peel my apple.  I ended up with 1 cup grated apple with great results)
1/2 cup unsweetened coconut flakes

  1. Preheat oven to 350 degrees.  Combine the dry ingredients in a bowl.  In a separate bowl, combine the wet ingredients.  Slowly add the dry ingredients into the wet and stir to combine.  
  2. Mix in the grated carrots, apple and coconut.   Place 1 tbsp of batter into greased mini muffin tins.  Bake mini muffins for 10-15 minute.  Regular sized muffins for 15-18 min for until toothpick comes clean.  Serve.

- Adapted from Weelicious:  Carrot Apple Coconut Muffins


My youngest couldn't wait to get her hands on one!  It was a hit!!  Hubby and the kids approved of this recipe (even when I used a blend whole wheat flour/wheat germ/ground flaxseed instead of all purpose flour).  The kiddies ate 2 mini muffins each and wanted more.  I had to hide the rest to bring for Snack Day tomorrow! 

Enjoy!
Pin It

Monday, October 1, 2012

Muffin Tin Monday - October 1, 2012

I can't believe it is October already!  The month of September flew by so fast with school, ice skating lessons, birthday parties, etc... Last week, we all got sick  from our first official cold bug of the season.  It was nice to stay home this weekend and recover.


Yesterday's lunch was fun:  sugar snap peas, red peppers, blueberries on toothpicks, imitation crab meat, sliced prune plums, wedges of Laughing Cow cheese and stoned wheat thin crackers.  The children enjoyed spreading the soft cheese on their crackers.  


It was a pretty light fare. Since they just got over their colds, I'm happy that they were eating again!  

For more great lunch ideas, visit Muffin Tin Mom!  Happy Monday!

Enjoy!


Pin It

Sunday, September 16, 2012

Muffin Tin Monday - September 17, 2012

Am I the only one still struggling to get in that "back to school" routine?  It was Nessa's turn to bring a snack to share with her class.  In my classic "rummage through the fridge and pantry" style, I wanted to throw something together for everyone to enjoy.  Normally, I plan the night before but I got lazy and made it right before she left for school!  With only a handful of different items left in the fridge, I lucked out that this muffin tin snack turned out so cute and colourful! 


Today's snack:  juicy strawberries, shiny grape tomatoes, diced cheese sticks, chocolate and pizza flavoured Goldfish crackers, diced farmer's stix (mild pepperoni), red pepper sticks, cucumber bear cut-outs and crunchy green grapes.  

My middle child attends the Kindergarten program at our local Montessori Academy.  My preschooler is there too, so I tried to make this appealing to the 3-5 year age group. 


I think I have most of the food groups covered... some fruit, veggies, dairy, meat, grains and a little chocolate... hahaha, am I the only one who thinks chocolate is a food group? 

For more great lunch ideas, visit Muffin Tin Mom!  Happy Monday!

Enjoy!

Pin It

Friday, May 25, 2012

Microwave Popcorn in a Glass Bowl

Last year I stumbled across Snack Girl's Homemade Microwave Popcorn and thought it was the neatest thing to put popcorn kernels into a plain (food grade) paper bag and microwave it.  We tried the paper bag trick several times.  Then, I started thinking about the added cost and the extra waste of these brown paper bags. 


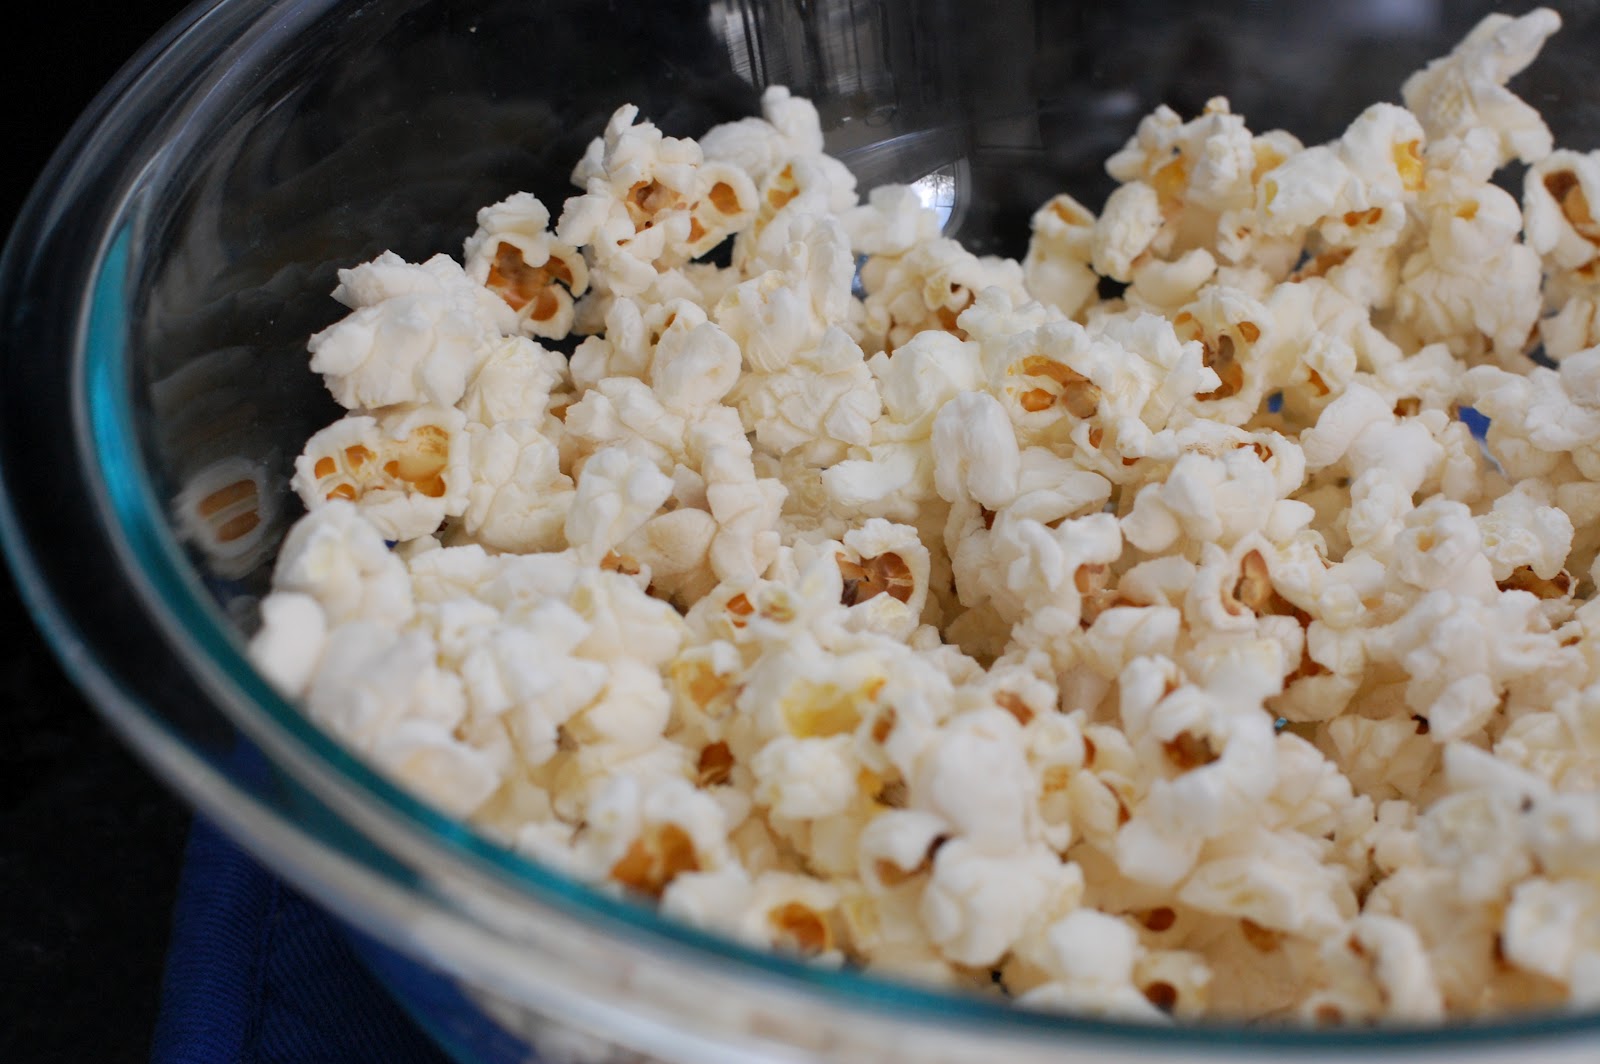
Out of curiosity, I used a large 2.4L/2.5 quart glass pyrex bowl, put in 3 tablespoons of corn kernel, and covered with a lightweight dinner plate (left a small vent for steam).  Within 5 minutes, I had microwave popcorn!


The largest glass bowl I had was a 2.4 quart glass bowl.  Any popcorn kernels will do.  When it is time to buy more popcorn, I will try organic non-genetically modified (GMO) popcorn.


Put in 3 Tbsp of popcorn in the bottom of the bowl.   


Cover the bowl with a lightweight dinner plate or glass lid.  (I love my new Corelle Iris set from Walmart!).  Leave a small gap to vent some steam.  Make sure the gap is not too big or else popcorn will escape!  Ready for the microwave!


Set the microwave for 5 minutes.  Popcorn is ready when the popping slows down to 5-10 seconds between pops.  For us, it usually takes about 4 min 30 sec.  


Done!  Success!


I like to use melted butter in popcorn.  No complaints from the kiddies!   Since the glass bowl is nice and hot, I just rub a pat of butter along the sides of the bowl to melt it.  Toss the popcorn around the melted butter.  You can use butter, extra virgin olive oil and other seasonings afterwards.   


I like to use a Herb and Spice sea salt blend in a salt grinder.  I ran out of the blend and made my own with coarse sea salt, rosemary, coriander and garlic dip seasoning (from our local garlic festival).  


Making microwave popcorn takes a few tries, even with the commercial stuff.  You don't want to overcook and burn the popcorn but you want to pop most of the kernels. It all depends on your microwave's personality, the thickness of the glass bowl and the thickness of the dinnerplate cover.  It took about 4 min 30 seconds for ours to pop.  If you use a paper bag, it takes less time to pop, as the heat penetrates the paper bag quicker than the glass bowl and lid. 

We don't have microwave popcorn all the time.  It's a nice thing to have 2-3 times in a month.  Yes, I have read the dangers of using the microwave.  Here's one article that I came across that has some good information to keep in mind (Microwave Hazards).  I like to read different sides of a story and decide from there. 

Glass Bowl Microwave Popcorn

3 Tbsp popcorn kernels
1 large 2.4Qt/2.5L glass bowl
1 large dinner plate or glass lid, large enough to cover the bowl but leave a vent
Popcorn seasoning of your choice:  butter, coconut oil, extra virgin olive oil, sea salt, etc. 

Place 3 Tbsp popcorn kernels in a large glass bowl.  Cover the bowl with a large dinner plate or glass lid.  Make a vent for steam to escape, approximately the width of a pinky finger.  Not too wide or the popcorn will escape!  

Microwave for 5 minutes or until there are 5 seconds between pops.  Do not burn the popcorn.  Microwave times depend the microwave, wattage, the thickness of the glass bowl and the thickness of the lid.  

Season popcorn as desired.  

 In case anyone is curious, I only had 8 unpopped kernels from this batch! 

Enjoy!


Pin It

Tuesday, May 22, 2012

Honey Whole Wheat Banana Muffins

I told my kids that the brown spots on ripening bananas were "brown sugar spots".  The more spots, the sweeter they are... and that's how I got my kiddies to eat bananas as they ripened.  So if I want to make banana bread or banana muffins, I have to hide my ripe bananas or else they would be all gone!


I had 4 bananas that were ripe for baking.  I was inspired by my friend's gorgeous Banana Chocolate and Peanut Butter Muffins!  Alas, I am allergic to chocolate and hubby and the kids are allergic to peanuts.  Instead of chocolate and peanut butter,  I used different ingredients.  My last batch of whole wheat blueberry bran muffins turned out really good and moist, so I'll go whole wheat again.

I used a basic whole wheat banana bread recipe and made my modifications from there.  I wanted to use whole wheat flour, wheat germ, ground flaxseed, buttermilk, honey and coconut oil.  For more information about coconut oil, visit Dr. Oz's article on the Benefits of Coconut Oil.  

The result?  A very pleasant, not too sweet, moist and healthy banana muffin that my family enjoyed.  I will make this one again.  

If you are expecting a super fluffy, sugary sweet and intense banana flavoured muffin/cupcake, this is not it.  I told hubby that the muffin has the taste of honey whole wheat bread with a kiss of banana.  I find that the banana flavour intensifies when they are super ripe and a lot of sugar is added.  


Honey Whole Wheat Banana Muffins

1 ½ cups whole wheat flour
½ cup wheat germ
2 Tbsp ground flax seed
1 tsp cinnamon
1 tsp baking soda
1 tsp baking powder
1 large egg
1/3 cup honey
1/3 cup buttermilk
1 tsp vanilla extract
¼ cup canola oil, melted butter or coconut oil, melted (I used coconut oil)
4 bananas, mashed (between 1-2 cups)

Preheat oven to 400F

Mix all dry ingredients together.  Add egg, honey, buttermilk and vanilla to the dry ingredients.   Add bananas and melted coconut oil.  Mix until the ingredients are well blended together. 
  
Scoop batter in 12 muffin tins, each about ¾ full. 

Bake about 12-15min until done. Check the muffins around 10-12 minutes. Mine were done at 12 minutes.   

- Adapted from 100 Days of Real Food:  Whole Wheat Banana Bread


 Enjoy!
Pin It

Thursday, May 17, 2012

100% Whole Wheat Chocolate Chip Cookies

Here is another classic treat in our household:  whole wheat chocolate chip cookies.  I used the famous Toll House cookie recipe and changed it a little.  I couldn't help myself. I made them with whole wheat flour!  


I have seen many chocolate chip cookie recipes that use a blend of whole wheat and all-purpose flour.  Instead, I used all whole wheat flour and omitted the salt. 

Ever since I made them 100% whole wheat, it has been my reliable and most trustworthy chocolate chip cookie recipe for over 5 years.  The true test was when I made these cookies for my son's 4th birthday party, over 3 years ago.  I baked these cookies and the children ate them without noticing that they were whole wheat!  
  
It helped that I put one Smartie candy in the middle of each cookie.  No complaints at all!  They still have loads of fat and sugar, so consider them a heartier treat. 

  
Whole Wheat Chocolate Chip Cookies

2 1/4 cups whole wheat flour
1 teaspoon baking soda
1 cup (2 sticks) butter, softened (I used 1 cup soft non-hydrogenated margarine)
3/4 cup granulated sugar (I used 1/2 cup granulated sugar)
3/4 cup packed brown sugar (I used 1 cup brown sugar)
1 teaspoon vanilla extract
2 large eggs
2 cups (12-oz. pkg.) chocolate chips (I used 1 cup chocolate chips)
1 cup chopped nuts (optional, I omitted)
Preheat oven to 375° F.

Combine flour, baking soda and salt in small bowl. Beat butter, granulated sugar, brown sugar and vanilla extract in large mixer bowl until creamy. Add eggs, one at a time, beating well after each addition. Gradually beat in flour mixture. Stir in chocolate chips (and nuts, if using). Drop by rounded tablespoon onto ungreased baking sheets.  At this point, I added 1 Smartie candy to each cookie before baking. 

Bake for 9 to 11 minutes or until golden brown. Cool on baking sheets for 2 minutes; remove to wire racks to cool completely.  

 
Within a day, they were all gone!  We ate some and then shared the rest with our wonderful friends.  
Can you find the cookie with the hidden wink and smile?

Enjoy!
Pin It

Thursday, May 10, 2012

Muffin Tin Snack Day

It's Nessa's turn for Snack Day at preschool and I think I have a system that provides a bit of everything for everyone.  There are 8 preschoolers in her class and I figure that a muffin tin of snacks can provide enough for that number of kiddies.


I tried to offer a variety of fruits and vegetables plus 1 protein.  Veggie cups have mix of cucumber sticks, baby carrots and sweet yellow bell peppers.  Even if the children don't eat their veggies, I know for sure they will gobble the bright red luscious strawberries and juicy watermelon balls.  I threw in the ham sausage slices for protein.  I really like how cute the silicone muffin liners turned out.  I guess the theme is "we eat whatever the supermarket has on sale and in season"!  


I also included a package of baked rice crackers.  Better to have too much food than not enough!

For more great kids' lunch ideas, check out Muffin Tin Mom.
  
Enjoy!
Pin It

Wednesday, May 2, 2012

Whole Wheat Blueberry Honey Bran Muffins

Trying to eat better is always a struggle!  I strive for balance and moderation. The cupcakes are a great treat and fundraiser but we can't that all the time or it wouldn't be special anymore.  Looking around the web, there is a wonderful movement for eating real food.  Food that is unrefined, unprocessed, made from scratch and organic.  

So I tried to look for a bran muffin recipe that was: 1) simple and easy  2) didn't use white sugar or white flour and 3) healthy.  I came across the Eat Clean Diet website for Blueberry Bran Muffins and had to give it a try! 


They turned out beautiful!  Maybe it's just me, but I thought they were a little on the sweet side.  Hubby didn't complain that they were too sweet.  Nor did the kids.  Next time, I will try use 1/3 cup honey instead of 1/2 cup and see if anyone notices the difference. 

Whole Wheat Blueberry Honey Bran Muffins

Makes 1 dozen
1 1/2 cups wheat bran
1 cup skim milk (I used 1% buttermilk)
1/2 cup unsweetened applesauce
1 egg
1/2 cup honey (Next time will try 1/3 cup)
1/2 tsp vanilla
1 cup whole wheat flour
1 tsp baking soda
1 tsp baking powder
1 tsp salt (I used 1/2 tsp )
1 cup blueberries (fresh or frozen) (I used 1.5 cup)

Preheat oven to 375F.  Line or spray muffin tins with oil. 

Mix together bran and milk - let stand 10 minutes.

In a large bowl, mix applesauce, egg, honey and vanilla. Sift together flour, baking soda, baking powder and salt, make a well. Add wet ingredients to the dry ingredients, stir until combined. Add bran/milk mixture and mix until just blended. Fold in blueberries.

Scoop into muffin tins and bake for 15-20 minutes, until the tops spring back when lightly tapped.

- From The Eat Clean Diet: Blueberry Bran Muffins

  
It's so rewarding to watch my family enjoy these muffins.  It keeps me going.  I try my best, but I won't feel guilty for the odd bag of potato chips and a rum (Malibu!) and Coke after a rough day! 


Enjoy!
Pin It

Monday, April 30, 2012

Muffin Tin Lunch

I love Sundays.  It is our "Family Day" where we all get dressed nicely and spend time together as family for church.  After that, we go grocery shopping, head back home and play outside.  While the kids are playing, I put the groceries away and load up a simple muffin tin lunch for the kiddies. Thanks Muffin Tin Mom!


The children enjoy a lovely variety of different foods.  Food presentation is so important to them (and me!).  I find that they do eat better and it is easier to introduce one new food at a time.  Yesterday's lunch:  carrot sticks, cucumber sticks, bacon Caesar dressing/dip, grapes, pita pizza, diced cheese sticks and imitation crab. 

The wonderful thing:  I had to reload the muffin pans 2 more times!


I lined the cavities with silicone muffin liners.  I like that they help keep the non-stick finish intact, but it was a little tedious to wash all 12 of them afterwards.  It was easy to do, but a little mind numbing.  


They had a very nice picnic lunch in the family room.  My best friend made this gorgeous "Under the Sea" quilt for my son when he was born and we used that as our special indoor picnic blanket.  It was so cute to see the children gather around and enjoy lunch together on the weekends.


For more great kids' lunch ideas, check out Muffin Tin Mom.

Enjoy!
Pin It

Saturday, April 28, 2012

Easy Pita Pizzas

I have no idea where the month has gone.  Somehow we got pretty busy.  What a week!  My son and husband had their first piano recital the other day and they were chosen to perform at the Encore performance last night! 

We needed a quick, easy Friday night dinner before the performance.  Pizza!


I also volunteered to bake some goodies for the Grades 4 to 7's Fun Day at my son's school yesterday.  Can I show you what else I've been up to?

  
Almost 200 hand-dipped baked mini donuts.  Recipe here. 
 

2 dozen Chocolate Oreo cupcakes.  I forgot to buy mini Oreo cookies.  Luckily, cutting the regular sized ones in quarter pieces worked great!
 

2 dozen medium sized cupcakes for my son's class.  Topped with strawberry ice wafers for a change.  The ice wafers were easier to cut into smaller pieces than the Oreos.  I prefer not to use candy.  (I tell my kids that there's enough treats out there besides gummy bears). 


Look at all those goodies! 


All packed and ready to go!  

Several years ago, I found the Snapware 3-level cake/cupcake carrier (left) at Costco for $12.  It carries 12 regular sized cupcakes per tier. The bottoms are reversible and can be turned to a flat surface for cakes or cookies (or mini donuts). Thank goodness I had the foresight to buy this before my oldest was in school.  I have a feeling it will be put to good use in the future.  The Wilton cake/cupcake carrier (right, from Walmart) carries 24 medium sized cupcakes.  The medium sized cupcake pan is hard to come by.  I bought mine at a consignment store about 10 years ago and I have never seen them again.  My advice:   when you buy a cake/cupcake carrier, check the size of cupcakes it holds. 

After baking and helping with Fun Day, I am a little tired.  All I wanted to do was pop a frozen pizza in and be done with dinner but I didn't have any!  Thank goodness my freezer had frozen pita bread!

When naan (Indian flat bread) or whole wheat pita bread goes on sale, I buy some to freeze for pizza crusts.  I had pita pizzas at a friend's house and it was so good!


So I gathered whatever I had in the fridge and pantry to throw some pizzas together.  That's the beauty of pizza:  just throw whatever you like on top of a crust of some sort.


Preheat oven 450F.  While oven is preheating, place frozen or fresh pitas on a tray.  


Add your favourite pizza sauce.  I use whatever pasta sauce I have in the in the fridge.  


Add your favourite pizza toppings.  Again, it's whatever I have in the pantry and fridge: Ukrainian sausage slices, black olives, fresh frozen pineapple, and frozen shredded cheese.

As an experiment, I bought some fresh pineapple on sale.  I chopped it up, froze it on a cookie sheet and then stored it in the freezer in a baggie.  Also, I buy bags of pre-shredded cheese on sale and freeze them for pizzas, pasta, sauces, etc.  Yes, you could also shred your own, but I like the different cheese blends that are available. 


Baked in the oven at 450F for approximately 10 minutes.  At this temperature, the edges get crispy.  They turned out very good!  Also good as appetizers and for parties.  

 
Another variation I made last week:  ham sausage, red peppers and leftover steamed broccoli!  

This doesn't really feel like a recipe.  It's more of a simple guideline as your tastebuds will dictate this dish.  I just wanted to document this one to my list of recipes. 

Easy Pita Pizzas

4 whole wheat or regular pita bread or naan bread 
3/4 cup your favourite pizza/pasta sauce
Ham, pepperoni, sausage or meat of your choice
Veggies:  red pepper, olives, broccoli, pineapple, etc.
Shredded mozzarella or pizza cheese of your choice

Preheat oven to 450F.

Place pitas on a lined baking tray.  Spread your favourite pizza sauce on pitas.  Add the toppings of your choice.  Top with shredded cheese. 

Bake for approximately 10 minutes or until cheese is browned.  


PS:  When my son came home from last night's performance, he was BEAMING!  (The performance was too late for his sisters.)  He received a Gold medal in the "Family Ensemble" category at our town's Festival of the Arts.  I am so glad he had such a positive experience at his first piano recital.  I'm a proud Mama! 

Enjoy!


  Pin It

Thursday, April 19, 2012

Muffin Tin Snacks and Meals

This month, Baby has gone to the same preschool as Nessa, so that means there is another Snack Day added to the schedule.  My Baby is growing up too fast!  She too will learn about sharing her snacks with the rest of the class. 

I had mentioned before in my Oatmeal cookie post that her classmate has a sensitivity to wheat, dairy and eggs.   For peace of mind, I always try bring something that everyone can enjoy together.  That's part of the meal times we have at home, so why not school? 


Then I came across Muffin Tin Mom's idea of serving food in muffin tin cups.  Sheer genius! 

I used Baby's favourite fruits and snacks and put them in each muffin cup. I have silicone muffin cups on order, so I can reduce the waste of the paper liners each time. 

The possibilities are endless!  I used watermelon balls, strawberries, fresh pineapple spears, slices of ham sausage, crackers and gluten-free crunchy Rice Chex cereal.  Next time, I will do a myriad of veggies, dip, cheese cubes and fishy crackers.  With this presentation, there will be a little something for everybody.

This idea was so cute, I had to share it!  Over the weekend, I didn't know what to do for lunch, so I put some sausage, cheese, fruit, veggies and some crackers in a tin.  We had a wonderful little picnic on a quilt in the middle of the living room floor.


This idea would be fun for playdates and parties too!  

 Enjoy!
Pin It